Iron Fence Shop® Blog

Find all sorts of informative posts in here about our products, installation, special types of use for our products and what to look for when buying a fence.

Everything You Need to Know About Iron Fence Installation

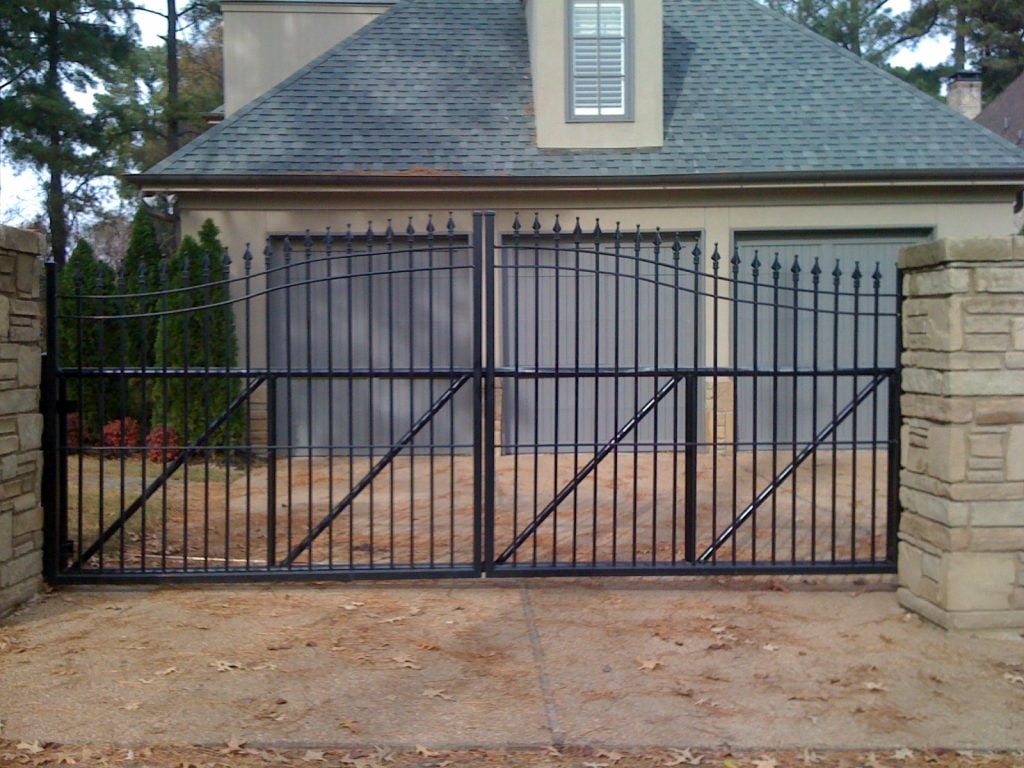
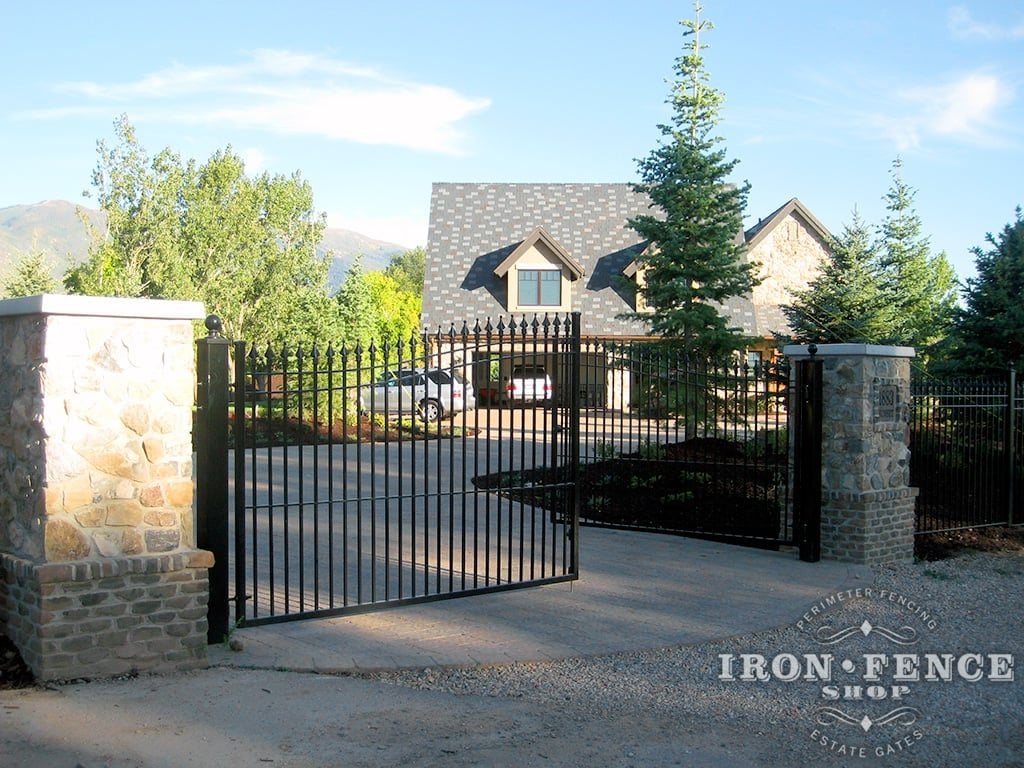
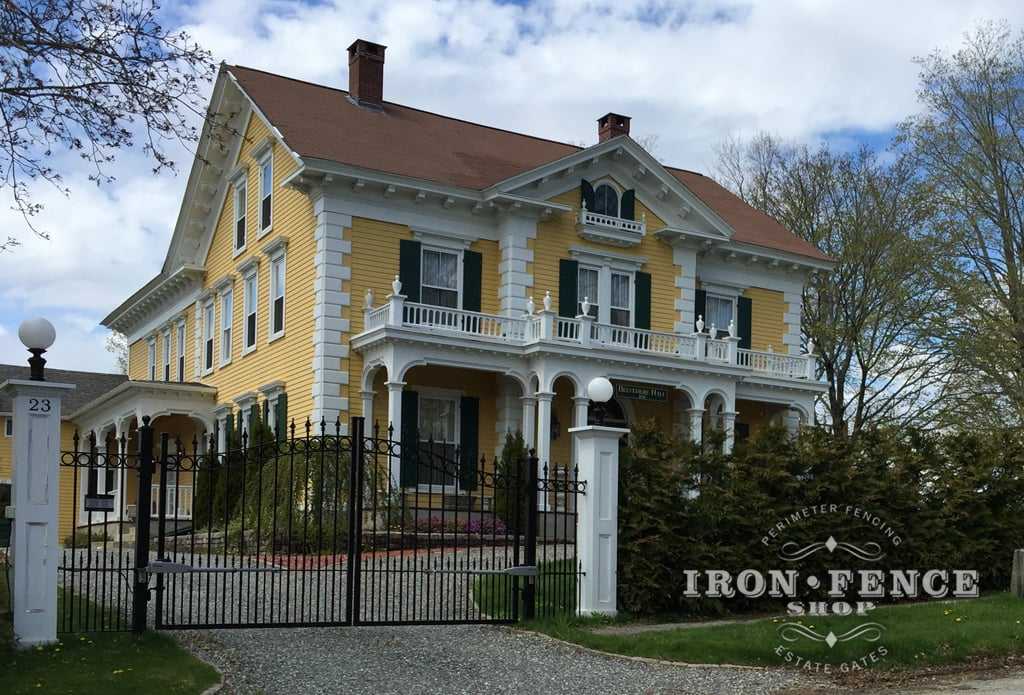
Transform your property with a timeless iron fence! 

This comprehensive guide walks you through every step of planning, installing, and maintaining your DIY iron fence. 

Dive in and start creating the sustainable and elegant fencing solution your space deserves!

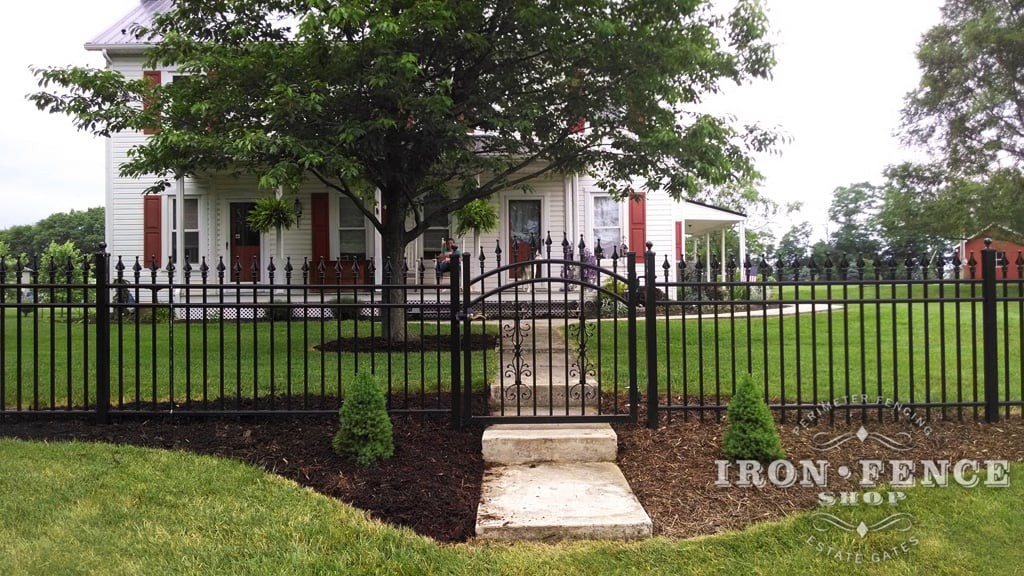
Choosing the Right Type of Iron Fence

Selecting the appropriate type of iron fence involves a comprehensive evaluation of several factors, such as:

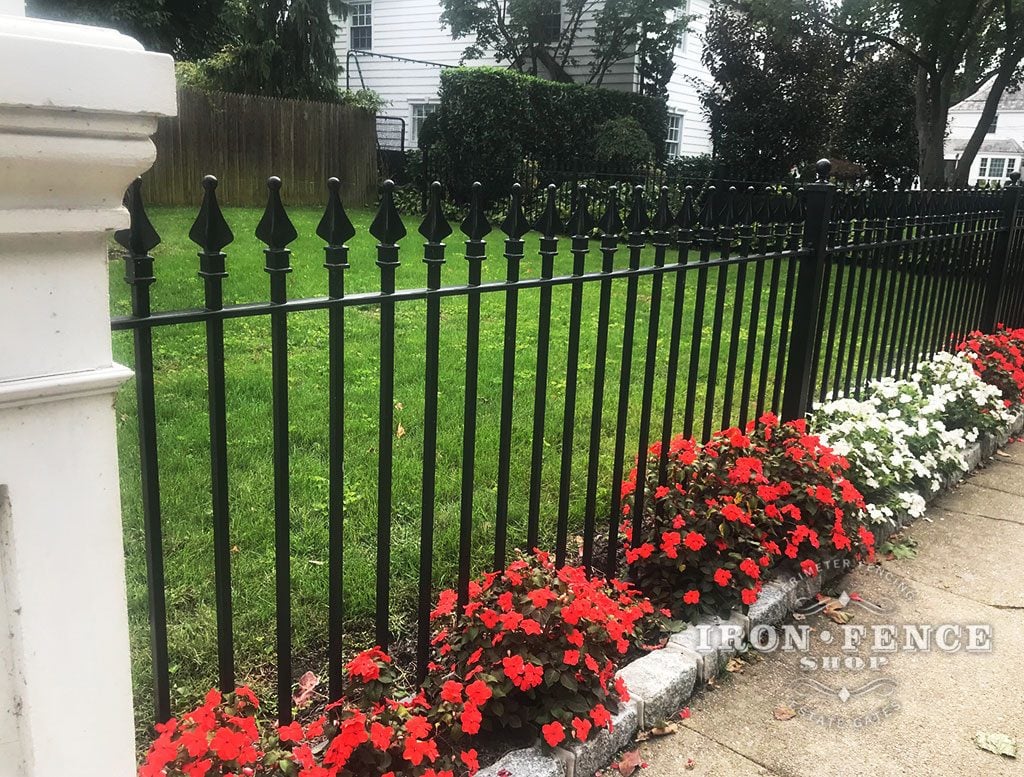
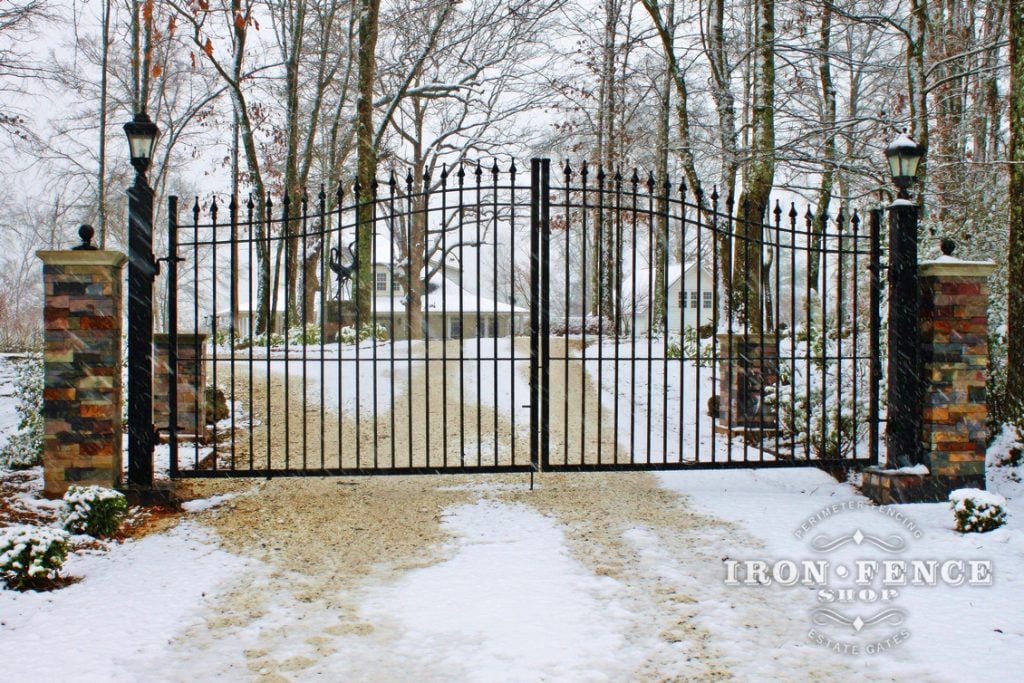
Styles of Iron Fences

Iron fences are available in various styles, offering visual charm and practical benefits. Modern iron fences focus on clean lines and minimalist aesthetics for those seeking a more contemporary appeal, making them an ideal complement to modern architecture. 

Determining the Appropriate Height

The height of an iron fence is determined by its intended purpose. Local regulations and zoning laws should be consulted to ensure compliance with height restrictions.

Material and Finish Considerations

The material and finish of an iron fence play a key role in its durability and maintenance needs. Galvanized iron is an excellent option for areas with high humidity or precipitation, as it offers superior resistance to rust and corrosion. 

Fences treated with TGIC (Triglycidyl Isocyanurate) powder coating offer exceptional durability and protection. This advanced coating provides superior surface adhesion, scratch resistance, and shields against environmental wear. Designed for prolonged sun exposure, it helps maintain vibrant colors and prevents issues such as chalking or fading over time. 

UV fade resistance ensures the fence retains its sleek, polished appearance even in harsh outdoor conditions. These combined benefits make TGIC-coated fences a reliable, low-maintenance solution for any outdoor setting.

Required Tools for Iron Fence Installation

Installing an iron fence requires comprehensive tools to ensure precision and efficiency. The following list delineates the essential tools required for a successful DIY iron fence installation:

Measuring Tools

Accurate measurement is key for correctly aligning and spacing fence posts and panels. A tape measure is essential for precise spacing. Use a string line to ensure that posts and panels are perfectly vertical and horizontal for optimal alignment.

Digging Equipment

The installation process requires excavating post holes. A post-hole digger or an auger is essential for this task. A power auger may be more efficient for projects involving numerous posts, particularly in dense or rocky soil conditions.

String Line

The primary purpose of a string line is to ensure that all fence posts are aligned in a perfectly straight line. Without it, slight deviations in post placement can lead to misaligned panels and an uneven fence that won’t look professional.

Cutting Tools

Depending on the fence’s specific dimensions and layout, iron panels or posts may need to be cut to size. A metal cutting saw, such as a reciprocating saw with a metal-cutting blade or an angle grinder, is suitable for this purpose.

Fastening Tools

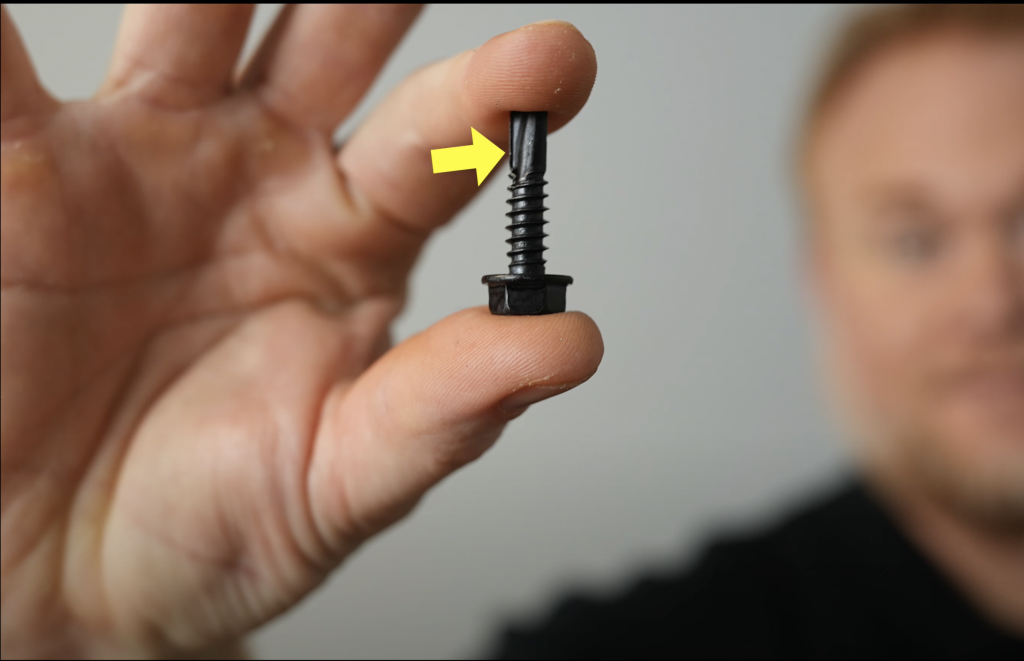
A drill with metal drill bits is required to secure the fence panels to the posts. Additionally, a wrench or socket set is necessary for tightening bolts and screws. It is advisable to use stainless steel or galvanized fasteners to prevent corrosion.

Safety Equipment

Personal protective equipment (PPE) is important to ensure safety during installation. This includes safety glasses to protect against metal shards, gloves to prevent hand injuries, and ear protection when using power tools.

A 2013 study by The University of Iowa Hospitals and Clinics highlights the risks associated with projects such as DIY iron fence installations. The accompanying pie chart on eye injuries treated in the ER illustrates these dangers.

eye injury types in ER chart

DIY iron fence installation involves cutting, drilling, and grinding, which poses risks to your eyes. 

The chart shows that the most common eye injuries include contusions or abrasions (45%) and injuries caused by foreign bodies (32%). These dangers may occur during cutting iron fences, as flying particles, sparks, or debris can easily enter and damage your eyes.

Wearing safety goggles is essential to prevent these risks. Goggles protect against airborne metal debris and sparks, reducing the likelihood of abrasions or particles entering your eyes. 

Proper tool handling, ensuring they are in good condition, and using them correctly can help minimize burns (10%) and conjunctivitis (10%), which are also common hazards.

Another important safety measure is a clear and well-lit work area. It reduces the chances of accidents and helps you stay aware of sharp materials, decreasing the already rare risk of puncture injuries (1%) and lacerations (2%)

With safety precautions, you can confidently and successfully install your iron fence while protecting your vision.

Permits and Regulations Should You Be Aware Of

When undertaking a DIY iron fence installation, it is imperative to be cognizant of the various permits and regulations that govern such projects. These include:

Zoning Laws and Property Lines

Local municipalities establish zoning laws to regulate land use and development. These laws can dictate the permissible height, style, and placement of fences. 

Property lines must be accurately determined to avoid encroachment on neighboring properties. Encroachment can lead to legal disputes and potential removal of the fence. A professional surveyor can provide precise measurements of property boundaries, which is a prudent step before commencing installation.

Permit Application Process

The process of obtaining a permit typically involves submitting detailed plans of the proposed fence to the local building department. 

The review process can vary in duration, often taking a few days to several weeks. To accommodate any potential delays, it is advisable to apply for permits well in advance of the planned installation date.

Pre-Installation Planning for Iron Fences

Accurate measurement and marking of the installation area are important steps in successfully installing an iron fence. 

The following guidelines provide a systematic approach to measuring and marking the installation area:

Determine the Perimeter

Begin by identifying the boundaries of the area where the fence will be installed. Use a measuring tape to determine the total length of the perimeter. It is advisable to measure twice to ensure accuracy. Record these measurements for reference during the installation process.

Identify Key Points

Mark the locations of key points such as corners, gates, and any changes in direction. These points will serve as reference markers for the placement of posts. Use spray paints to mark these positions clearly.

Calculate Post Spacing

Most wrought iron panels are 96 inches (8 feet) wide. To keep your fence sturdy and aligned, space your posts 96 inches apart for proper panel mounting. 

Calculate your post placement by adding the panel width (96 inches) to your post width (typically 2 inches). This gives you an on-center measurement of 98 inches. 

Ensure that the spacing is consistent to maintain structural integrity and aesthetic uniformity.

Mark Post Locations

Mark the ground where each post will be installed using the calculated post spacing. A spray paint can be used to ensure the marks are aligned straight. This alignment is essential for maintaining the fence’s visual appeal and structural stability.

Account for Terrain Variations

When marking the installation area, consider any variations in the terrain, such as slopes or uneven ground. Adjust the post locations as necessary to accommodate these variations while maintaining the overall alignment of the fence.

Verify Measurements

Before proceeding with the installation, verify all measurements and markings. This step helps to identify any discrepancies or errors that could affect the installation process. Adjust as needed to ensure the fence is installed according to the planned layout.

Proper Techniques for Digging Post Holes

Adhering to precise measurements and employing appropriate techniques when digging post holes for an iron fence is essential to ensure its structural integrity and longevity. 

The following steps outline the procedure for digging post holes and setting posts:

Marking the Locations

Determining post-hole placement begins with running a string line to ensure all posts remain aligned. Use a bright, visible string that can be pulled taut. 

Ensure the string represents the outside edge of the posts rather than the center of the fence line for accurate alignment. Position rebar or stakes outside corners to prevent interference while digging post holes, ensuring a straight and precise layout.

Digging the Holes

Excavate the holes using a post-hole digger or an auger. When digging your post holes, start at a marked “on-center” location and dig outward, ensuring the post hole’s center aligns with the string line. Post holes should be dug straight down to avoid issues such as frost heave in freezing conditions. 

The diameter of the hole should be approximately three times the post’s thickness. For example, a 2×2 post requires at least a 6-inch-wide hole, while a 4×4 post needs a minimum of 12 inches. 

Preparing the Base

Add a layer of gravel to the bottom of each hole. This layer facilitates drainage and prevents water accumulation, which can lead to post-rot or corrosion over time.
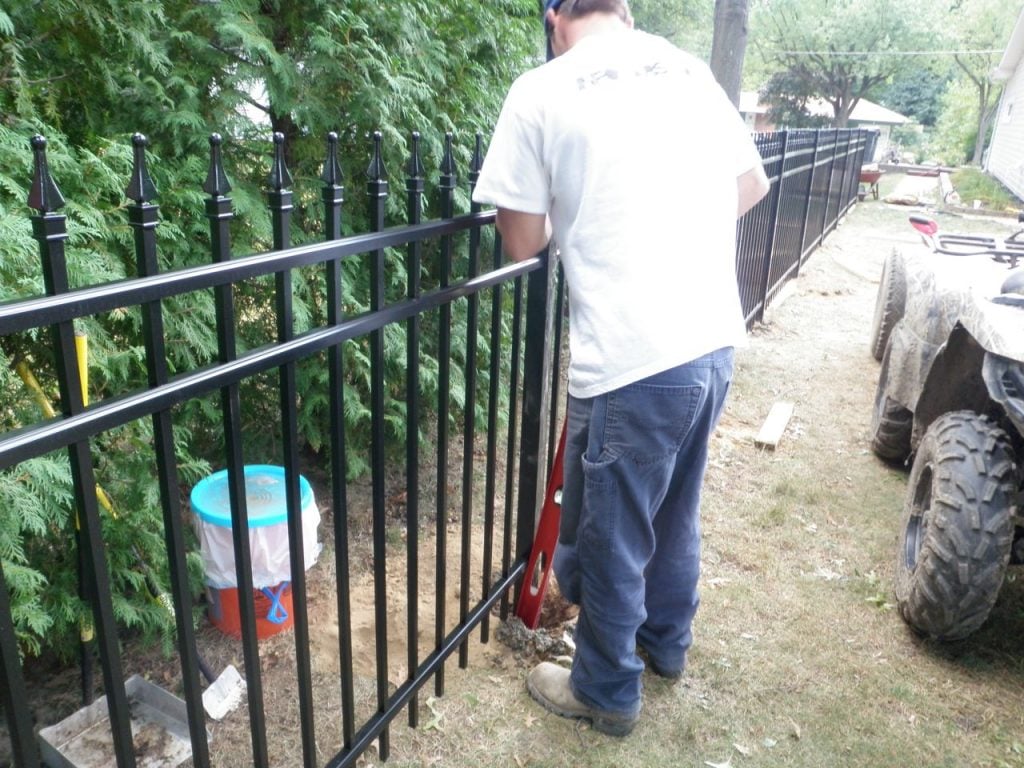
Setting the Posts

Position the post in the center of the hole, using a level to ensure it is plumb. Maintaining vertical alignment is essential to prevent the fence structure from leaning or becoming unstable.

Pouring Concrete

Begin by preparing a thick concrete mix with a consistency resembling chunky peanut butter, ensuring it can hold the post upright without additional support

Start with an end or corner post and place it into the pre-dug hole, orienting any seams inward or outward from your property. Fill the hole halfway with concrete while positioning the post to touch the string line, then pour in more concrete until reaching 2–3 inches below ground level to allow for dirt coverage. 

Curing the Concrete

According to the National Precast Concrete Association, an organization that promotes quality precast concrete products, concrete typically takes 28 days to fully cure. However, the curing time can vary due to environmental factors such as temperature and humidity. 

As reported by aboutcivil.org in 2017, here is a graph showing how curing temperature affects the compressive strength of concrete over time, expressed as a percentage of its 28-day strength.

graph of curing temperature vs strength

According to the chart, concrete cured at higher temperatures, such as 32°C (90°F), gains strength rapidly in the initial days but tends to plateau earlier. 

In contrast, concrete cured at lower temperatures, such as 10°C (50°F) or 23°C (73°F) transitioning to 10°C, develops strength more slowly but eventually reaches similar compressive strength levels at later ages.

By 40 to 60 days, the strength of concrete under all temperature conditions converges, showing minimal variation. This highlights that while curing temperature influences the rate of strength gain early on, the final long-term strength remains largely unaffected. 

Michigan Concrete Association, an organization focused on supporting the concrete industry, highlights that:

“Strength and durability of concrete increase with age as long as moisture is present and temperatures remain favorable. Lack of curing or poor curing practices can cause a loss of up to 50% of the potential strength and significantly decrease durability.”

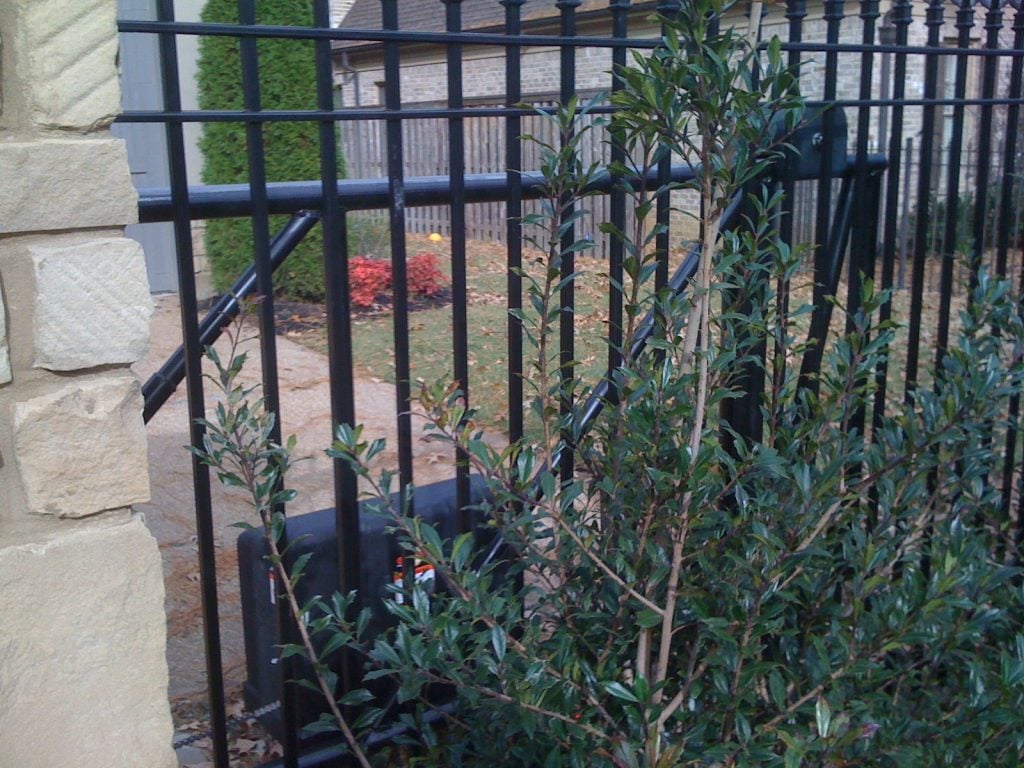
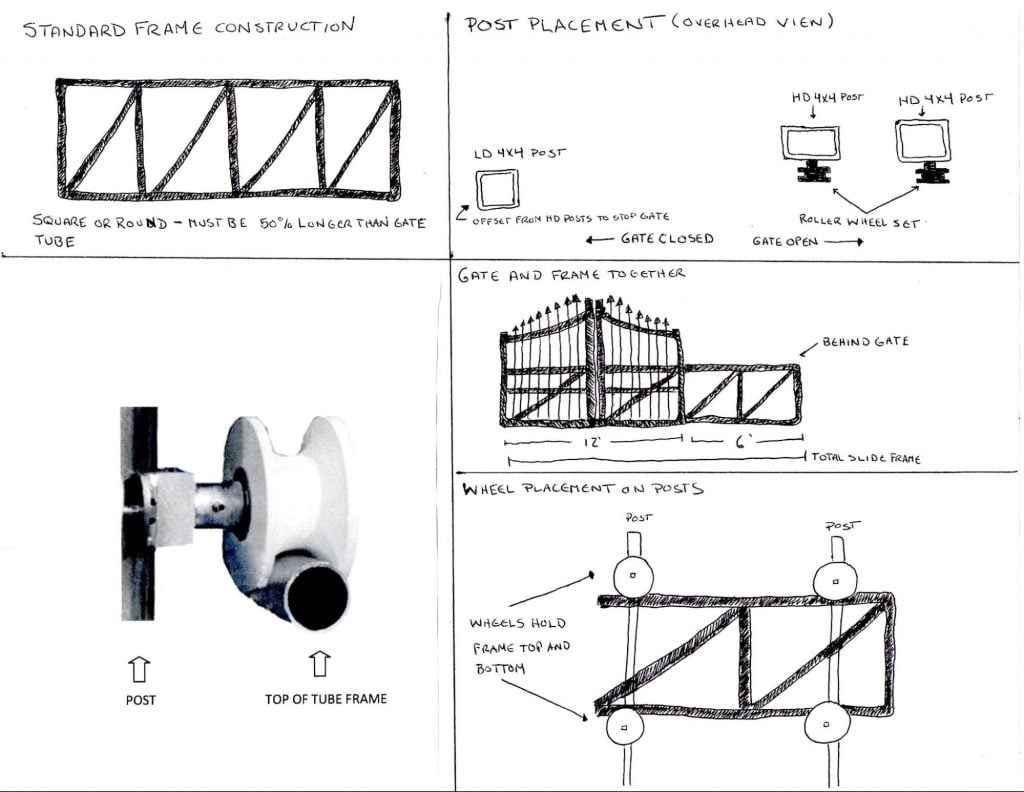
Attaching Fence Panels Securely to Posts

steps to building iron fence

Attaching fence panels to posts is a key step in installing an iron fence. It requires precision and adherence to best practices to ensure structural integrity and aesthetic appeal. 

The process involves several key considerations and steps, which are outlined below.

Selection of Appropriate Hardware

Use galvanized or stainless steel brackets and screws to prevent corrosion and ensure longevity. Ensure the hardware is designed to work with both the fence panels and posts, considering the thickness and material of each component.

Securing the Panels

Secure the brackets to the posts first with a power drill, ensuring they are firmly attached. Align the panel with the brackets and fasten it using screws, making sure each screw is driven straight to preserve the panel’s integrity.

Verification of Structural Stability

Once each panel is attached, apply gentle pressure to ensure it is securely fastened and shows no movement. Realign any misaligned panels promptly to avoid future structural issues.

Consideration of Environmental Factors

In high-wind areas, reinforce the structure with extra brackets or cross-bracing techniques for added stability. In regions with large temperature fluctuations, use flexible joint materials to accommodate expansion and contraction.

Essential Care Practices for Iron Fences

Maintaining an iron fence is essential to ensuring its longevity and aesthetic appeal. Regular maintenance tasks can be categorized into:

Inspection

Conduct a thorough inspection of your fence. Check for signs of rust, corrosion, or structural damage during the inspection, such as bent or loose panels and posts. Pay special attention to joints and connections, as these areas are more susceptible to wear and may need hardware tightening or replacement.

Cleaning

Regularly clean the fence to remove dirt, debris, and pollutants that may speed up corrosion. Use a mild detergent mixed with water and gently scrub the surface with a soft brush. Ensure all soap residue is rinsed with clean water, as leftover soap can attract dirt and retain moisture. A pressure washer can be effective for stubborn stains or heavy buildup, but use caution to prevent damage to the finish.

Repair

Take care of minor repairs promptly to prevent them from escalating into bigger problems. Tighten loose screws or bolts and replace any damaged hardware as needed. Remove the rust with a wire brush or sandpaper for rusted areas, then apply a rust-inhibitive primer and finish with a suitable paint or protective coating.

Long-Lasting Solutions for Corrosion Prevention

Protecting iron fences from rust and corrosion requires understanding the chemical processes involved and the application of effective preventative measures. 

Rust, or iron oxide, develops when iron reacts with oxygen in the presence of moisture. Environmental factors such as humidity, salt, and pollutants accelerate this reaction. 

Understanding the impact of these elements is essential for maintaining the fence’s durability. As reported by Corrosion Doctors, the chart below illustrates how pH levels (ranging from 0 to 14) correlate with the corrosion rate of iron (measured in millimeters per year).

chart showing corrosion of iron as a function of pH

Understanding how pH levels influence iron corrosion is essential for maintaining the longevity of iron fences. Iron is more prone to rapid corrosion in acidic environments (low pH), making protective measures such as applied coatings and regular maintenance essential. 

Iron exhibits greater stability in neutral and slightly alkaline conditions (pH 4-10), with corrosion rates dropping. This allows fences to last longer with minimal upkeep. 

In highly alkaline environments (high pH), corrosion rates remain low, but periodic inspections are still required to ensure the protective layers that naturally develop are intact. 

Implementing the following factors is essential for maintaining the integrity and appearance of an iron fence:

Protective Coatings

The galvanization process provides a different approach to corrosion prevention. This method involves coating the iron with a layer of zinc, which acts as a sacrificial anode by corroding in place of the iron. Galvanized iron is particularly effective in environments with high moisture or salt content, offering long-lasting protection.

Alternatively, TGIC (Triglycidyl Isocyanurate) powder coatings offer a durable and aesthetic protective layer for iron surfaces. This polyester-based coating delivers excellent resistance to UV radiation, chemicals, and abrasion, making it ideal for outdoor and industrial applications. 

Regular Maintenance

Routine maintenance plays a key role in preventing rust formation and extending the lifespan of iron fences. Start by regularly cleaning the fence with mild soap and water to remove dirt, salt, and other corrosive substances. Avoid harsh chemicals that could damage the protective coatings.

In addition to cleaning, periodic inspections are vital for identifying early signs of rust or damage to the protective layer. Timely detection enables prompt repairs, effectively stopping further deterioration and preserving the fence’s structural integrity.

According to the National Library of Medicine:

“The anaerobic corrosion of iron structures is expensive to repair and can be a safety and environmental concern. It has been known for over 100 years that the presence of anaerobic respiratory microorganisms can accelerate iron corrosion. Multiple studies have suggested that there are sulfate reducers, methanogens, and acetogens that can directly accept electrons from Fe(0) to support sulfate or carbon dioxide reduction.”

Examples of Creative DIY Fencing Projects That Improve Safety and Adaptability

Homeowners are turning to innovative DIY fencing solutions to address safety risks and enhance the functionality of their outdoor spaces. 

From building pool enclosures that protect children to modifying hazardous fences into wildlife-friendly designs, these projects showcase the power of thoughtful planning and hands-on effort. 

Here are two detailed examples that highlight how DIY fencing can transform spaces while balancing safety, aesthetics, and practicality.

Family Builds DIY Pool Fence to Ensure Safety

A family in Florida sought to improve the safety of their residential pool area after learning about the high risks of accidental drownings, particularly for children under the age of 5. Motivated by the U.S. Consumer Product Safety Commission’s (CPSC) guidelines on pool barriers, they embarked on a DIY project to install a compliant fence system

The family used the CPSC guidelines as their primary resource to ensure the barrier met safety requirements. They decided to install a 4.5-foot mesh fence with self-closing and self-latching gates. Following the recommendations, they ensured vertical spacing between fence posts did not exceed 1¾ inches to prevent climbing. 

The family encountered challenges ensuring the uneven ground did not create gaps under the fence, so they added gravel in problem areas for better stability. 

The project was a success, resulting in a layered safety system around the pool. The barrier effectively restricted access, even for the family’s young children, providing peace of mind. The DIY approach saved the family hundreds of dollars compared to hiring contractors, and they felt empowered by contributing to the safety of their home. 

By leveraging practical tips from both resources, such as choosing the appropriate fence height, homeowners can create effective barriers that meet safety and aesthetic needs. 

The family’s success highlights the importance of planning and adherence to safety practices to achieve fencing that provides lasting peace of mind.

Transforming Hazardous Fences Into Safe, Versatile Solutions

In Lakeway, TX, a pressing concern regarding dangerous iron fences prompted homeowner efforts and city ordinances to ensure local safety. Picket and spiked iron fences posed risks to wildlife, such as deer.

To address this, the city banned spiked and open picket fences in 2019, but homeowners were left to modify existing structures to comply with safety standards.

One particular example highlighted a Lakeway resident, Hamil Cooper, who undertook DIY efforts to make his fence safe. Using a Sawzall, he removed the protruding spikes from his metal fence and plugged the exposed holes using rubber caps ordered online. This cost-effective solution prevented further dangers to wildlife, showcasing how handy homeowners can take proactive measures.

These modifications have been widely successful for various applications beyond the home perimeter. Iron fences can double as pool enclosures with adjustments such as flat-topped panels.

By combining elegant design with safety measures, these DIY approaches offer homeowners versatile, reliable fencing solutions tailored to their unique needs.

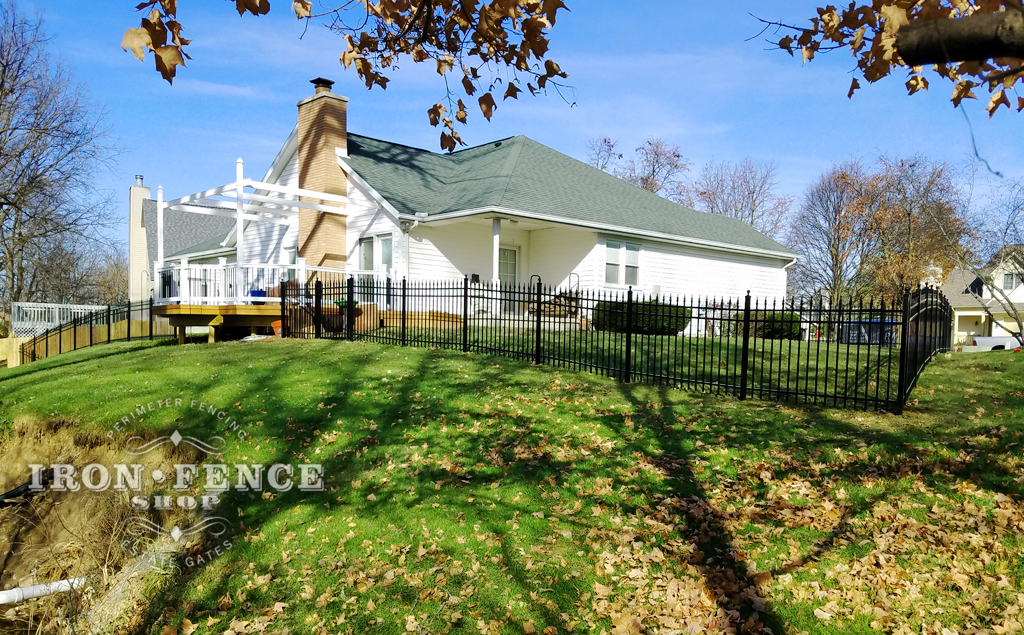
Leveling Techniques for Sloped Fence Installation

When installing an iron fence on uneven ground or slopes, it is important to employ techniques that ensure aesthetic appeal and structural integrity. 

The primary challenge lies in maintaining a consistent fence height while accommodating the natural variations in terrain. This can be achieved through two the following methods:

Steping Method

For a yard with a mild slope, you can “stair-step” the fence panels by installing each panel at a slightly different height on its posts to create a series of steps that follow the grade. This method ensures a consistent panel-to-ground clearance while maintaining a uniform top profile. 

To implement this method, measure the slope’s gradient and determine the height difference between adjacent posts. Adjust the post heights accordingly to maintain a uniform appearance.

Ensure that each post is securely set in concrete to prevent movement, which can be more pronounced on sloped terrain.

Backfill Method

For steeper slopes, shorten panels by cutting them into smaller sections and adding extra posts to keep gaps at the bottom of the fence manageable. 

When placing your posts, remember to dig them deeper on the higher side of the slope so they stay tall enough for proper support. The standard panel width is 96 inches, but when you trim a panel, leave at least 1.5 inches of rail on each end so the brackets fit securely. 

To finish, you can backfill with soil or stones under the panels to close gaps if needed,  just make sure not to block drainage. With careful adjustments, you’ll have a level-looking iron fence that hugs the slope.

Clearing Pathways for Smooth Iron Fence Installation

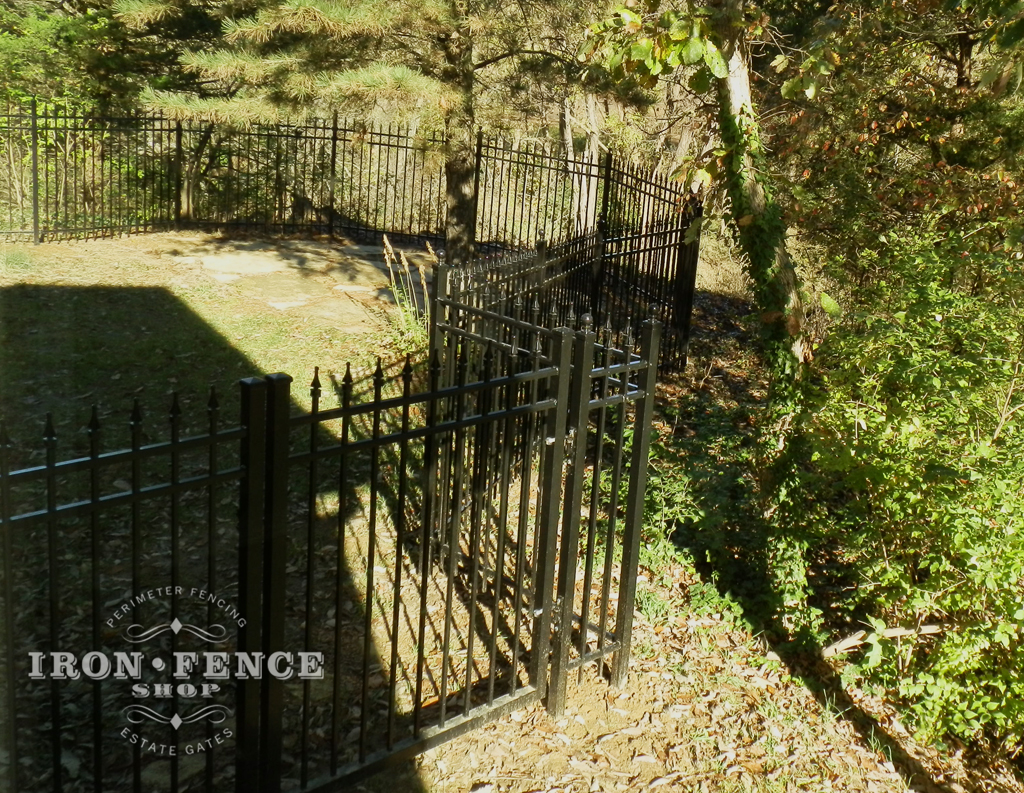
When installing an iron fence, encountering natural obstacles such as trees or rocks is a common challenge that requires strategic planning and execution. 

Addressing the following obstacles effectively ensures the fence’s structural integrity and aesthetic appeal:

Trees and Roots

Start by thoroughly assessing the tree’s root system, as roots often extend well beyond the visible canopy. Disturbing these roots can harm the tree and compromise the fence’s stability. To mitigate these risks, plan the fence line strategically to minimize root disturbance. This may require adjusting the layout to curve around the tree or adopting alternative post-placement methods. 

One effective strategy is using offset post placement, where fence posts are positioned safely from the tree roots to prevent cutting through major root systems. 

Additionally, consider using adjustable brackets or flexible connectors to accommodate the tree’s natural growth and movement over time, ensuring the fence remains functional and tree-friendly.

Rocks and Rocky Soil

Start by identifying the size and location of rocks along the intended fence line through visual inspection or, if necessary, subsurface probing. Determining whether the rocks are surface-level or embedded in the soil is essential, as this will dictate the most effective installation method.

Repositioning the fence line to bypass the obstacle may be a viable solution for surface-level rocks. If repositioning is not feasible, rock drilling equipment can be employed to create suitable holes for post-placement. For embedded rocks, consider using specialized tools such as rock augers or pneumatic drills to penetrate the rock and secure the posts

Alternatively, concrete footings can anchor posts above the rock surface without sacrificing stability. In addition, corrosion-resistant materials and coatings for posts and brackets should be used to prevent long-term degradation in rocky or root-filled environments.

Finally, reinforce posts with additional bracing or support structures to address potential instability caused by uneven terrain or root movement, ensuring the fence remains durable and strong.

Simplify Your DIY Fence Installation

Installing an iron fence can be rewarding, but preparation and precision are key to success. You can create a durable and visually appealing fence by choosing the right style, height, and materials, planning your layout carefully, and using the proper tools and techniques.

Safety is paramount; use protective gear and follow best practices to prevent injuries while working with iron. Regular maintenance ensures your fence remains attractive and resilient against rust and environmental elements.

Begin your project confidently and transform your space with a sturdy, elegant iron fence!

References

  1. Chorioretinitis Sclopetaria: A Systems Based Approach to Eye Injury Prevention. (n.d.). The University of Iowa Hospitals and Clinics. https://webeye.ophth.uiowa.edu/eyeforum/cases/175-Sclopetaria-Chorioretinitis.htm#gsc.tab=0
  2. How Long to Cure Concrete and Effects of Curing. (n.d.). aboutcivil.org. https://www.aboutcivil.org/concrete-curing-methods-effects-requirements.html
  3. (n.d.). Corrosion Doctors. https://www.corrosion-doctors.org/Forms-crevice/iron-corrosionX.htm
  4. Safety Barrier Guidelines for Residential Pools – Preventing Child Drownings – CPSC Publication 362. (n.d.). Pool Safely. Retrieved January 15, 2025, from https://www.poolsafely.gov/wp-content/uploads/2016/04/Safety-Barrier-Guidelines-for-Residential-Pools.pdf
  5. Safe Fencing. (n.d.). Lakeway Texas. https://www.lakeway-tx.gov/1778/Safe-Fencing

Best Way to Install Aluminum Fence

white house with decorative black iron fence

Aluminum fences are a popular choice for homeowners due to their durability, low maintenance, and aesthetic appeal. They enhance the visual appeal of a property without obstructing views.

Installing an aluminum fence involves careful planning and execution to ensure it is both functional and visually pleasing. This article outlines the best practices for installing an aluminum fence, addressing common questions and challenges associated with the process.

What Tools and Supplies Will I Need?

For a successful aluminum fence installation, it is essential to gather the appropriate tools and supplies beforehand. This preparation ensures a smooth installation process and helps avoid unnecessary delays. The following is a comprehensive list of tools and materials typically required for the installation of an aluminum fence:

Tools

  • String Line and Stakes: Used to mark a straight line along which the aluminum fence will be installed, ensuring alignment and consistency across the entire length of the fence.
  • Shovel and Post Hole Digger (Manual or Powered): Essential for digging holes to the appropriate depth to set aluminum fence posts, depending on soil conditions and project size.
  • Tub, Wheelbarrow, or Powered Mixer: Needed for mixing concrete when setting the aluminum fence posts securely.
  • Measuring Tape: Crucial for accurately determining the installation area’s dimensions and ensuring correct spacing of aluminum fence panels and posts.
  • Level: Ensures that the aluminum fence posts and panels are installed straight and even, which is vital for overall structure and aesthetic appeal.
  • Rubber Mallet and Regular Hammer: Used for gently adjusting aluminum fence panels and posts and driving in necessary fixtures without damaging materials.
  • Hacksaw or Sawzall: Appropriate for trimming panels when adjustments are required for a custom fit. 
  • High-Speed Drill or Power Driver: Essential for securing fence panels to posts efficiently and accurately.
  • Center Punch: Used to mark drill points on aluminum for accurate placement of screws or fasteners.
  • Socket and/or Wrench Set: Necessary for installing the supplied gate hardware securely.
  • Caulk Gun: Helpful for sealing caps or other joints if needed during installation.

Miscellaneous Supplies

  • Concrete Mix: Any standard concrete mix will work for setting the aluminum fence posts securely. Reinforced or fast-setting concrete can be used, but it is not required. The number of concrete bags needed will vary depending on the size and length of posts being buried.
  • Large Gravel (Optional): Adding large gravel to the bottom of fence post holes allows for proper moisture drainage, reducing the chances of post sinking due to freezing or excessive water. Gravel is especially helpful if post holes are accidentally dug too deep.
  • High Visibility Spray Paint: Used to mark the locations of post holes during the layout phase, ensuring accuracy in the digging process.
  • Steel Rebar or Wood Stakes: These are tapped into the ground and used to wrap the string line for marking a straight and consistent fence alignment during installation.
  • Protective Gear: Safety glasses, gloves, and other protective equipment are recommended to ensure safety during the installation process.

By assembling these tools and supplies in advance, individuals can facilitate an efficient and effective installation of an aluminum fence, ensuring both functionality and durability.

How to Measure and Mark the Installation Area?

To prepare for aluminum fence installation, start by measuring the perimeter of the area to be enclosed using a tape measure. Include corners and changes in direction in your measurements, and create a detailed sketch noting dimensions and any obstacles like trees or structures.

Use a string line when you marked the fence layout initially. The purpose of the string line is to make sure all of your posts remain in a straight line as you install the fence.

Consider property lines and boundaries, utility lines, and the terrain. Uneven ground or slopes may require adjustments to post spacing to maintain a consistent height. Proper planning will ensure a smooth installation process.

Pro Tip: Always check local zoning regulations and obtain permits before installing an aluminum fence, if necessary. This ensures compliance with property boundaries and avoids costly adjustments later!

Steps to Install an Aluminum Fence

white house with decorative black iron fence

Installing an aluminum fence is a step-by-step process that requires precision and attention to detail to ensure the final structure is secure, durable, and visually appealing. One critical aspect is following best practices at every stage of the installation, from setting the posts to aligning the panels. 

Here’s a guide to help you achieve professional-level results for your aluminum fence project.

1. Setting the Aluminum Fence Posts

The foundation of any great aluminum fence starts with properly installed posts. They provide the structural support that ensures the stability and longevity of your fence. Here’s why setting posts correctly is non-negotiable and how to do it right:

  • Identify the Post Spacing: Using the string line run for guidance, you need to determine how far apart your posts will be spaced. This will vary based on whether a full fence panel, trimmed fence panel or gate is going in-between two posts. Do the necessary measurements.
  • Determine the Post Depth: A good rule of thumb is to bury posts at least one-third their total length, with a minimum depth of 24 inches. This ensures the fence remains stable and prevents frost heave in colder climates. 

For example, a 6-foot fence would require posts to be buried at least 2 feet deep. Deeper fence post holes offer stronger support, particularly for taller fences or properties in areas prone to high winds or unstable soil.

  • Dig Larger Holes for Better Support: Use a post hole digger or auger to create holes at least three times the width of the posts. Wider holes allow more concrete support and better anchoring, which is essential for long-term durability.
  • Align with Precision: Maintain consistent spacing, depending on the fence design. Use a level to ensure each post is perfectly vertical and align them with a taut string line stretching between corner posts. This simple guideline guarantees a straight fence with no awkward angles.
  • Secure with Quality Concrete: Pour quick-setting concrete into the holes, evenly distributing it to eliminate air pockets. Shape the surface downward away from the post to facilitate water drainage. Quick-setting concrete is a preferred choice for its ease of use and rapid curing, which allows you to move to the next installation step sooner without sacrificing strength.

Mix your concrete to a thick consistency, similar to chunky peanut butter. This ensures it can hold the post upright in the hole without needing additional support.

  • Check Alignment Regularly: Continuously check the alignment and level of all posts throughout the process. Even a small deviation can result in a crooked fence, undermining both its appearance and functionality. Adjust the posts before the concrete fully sets to eliminate misalignments. Allow the concrete to cure for 24-48 hours before attaching the panels.

2. Attaching the Fence Panels

Fence panels connect the posts and are the most visible part of your aluminum fence. Properly attaching the panels not only ensures strength but also contributes to the overall aesthetics of the fence.

  • Gather the Right Tools: To make the process smooth, have all necessary tools on hand, including a power drill, level, measuring tape, and the appropriate fasteners (such as screws or brackets). Using the right fasteners ensures a secure and lasting attachment.
  • Align Each Panel with Care: Begin by placing the first panel between two posts and ensure it is level before securing it. Use a spirit or laser level to confirm horizontal alignment. This step helps maintain a uniform fence line throughout the installation.
  • Secure Top to Bottom: Attach the panel starting at the top and then secure the bottom. This approach prevents the panel from shifting during installation and ensures consistent alignment.
  • Adjust for Fit If Necessary: Properties with unique layouts may require cutting panels to fit specific dimensions. When making adjustments, take precise measurements and use proper cutting tools to avoid damaging the panel or its coating. For sloped terrain, stepped or rackable panels offer the best solution, as they provide flexibility to accommodate height changes while maintaining a clean, continuous look.

3. Ensuring the Fence is Level and Secure

A properly installed aluminum fence should be level, aligned, and secure to withstand daily use and environmental challenges. Here are the best practices to achieve a flawless finish and why they are crucial:

  • Anchor Posts Firmly: Posts that are properly leveled and secured in concrete are the backbone of a stable fence. Slight misalignments during this stage can cause structural weaknesses or uneven fence lines, so check them continuously before the concrete sets.
  • Address Uneven Terrain Proactively: For properties with sloped ground, stepped or rackable panels are the best choice to maintain visual appeal and consistent height. Adjusting panel heights on uneven terrain ensures a seamless look while avoiding gaps at the fence’s base.
  • Secure Fasteners and Check Stability: Tighten all screws, brackets, and fasteners securely. This step is vital for the fence’s long-term stability and safety. A secure fence not only provides effective property protection but also withstands impacts from weather conditions like strong winds or heavy rain.
  • Perform Regular Spot Checks: As you progress, inspect the alignment of posts, brackets, and panels periodically. Promptly fix any misalignments or loosening to prevent issues down the line.

Key Insight: Installing an aluminum fence requires careful precision to ensure stability, durability, and visual appeal. By focusing on proper post placement and panel alignment at every step, you can achieve professional results and a fence that stands the test of time.

How Do I Clean And Protect The Fence From Weather Damage?

To clean and protect an aluminum fence from weather damage, rinse the surface with a garden hose to remove loose dirt, then use a mild detergent with warm water and a soft cloth for tougher stains, avoiding abrasive materials or harsh chemicals that can harm the protective coating. After cleaning, rinse thoroughly and allow the entire fence to dry completely to avoid water spots. 

To shield the fence from UV rays, moisture, and other environmental factors, apply a protective wax or sealant designed for aluminum at least once a year, or more often in harsh climates. Regularly inspect the fence for scratches, chips, or wear in the protective coating, and address issues promptly to prevent further damage. These steps ensure the fence remains durable and visually appealing despite weather challenges.

Bring Your Aluminum Fence Project to Life

Now that you know the best way to install an aluminum fence, it’s time to bring your vision to life with Iron Fence Shop’s premium products. Explore our exclusive range of aluminum fences, featuring authentic detailing and a durable TGIC powder coat finish, ensuring your investment stands the test of time. 

Don’t wait—contact our expert team today at [email protected] and 800-261-2729 to get personalized advice and start your project with confidence!

What are the Types of Aluminum Fence?

white house with black iron fencing enclosing the backyard

Aluminum fences are a versatile, stylish, and practical choice for enhancing the appearance and functionality of any property. From clean and classic designs to decorative and safety-focused options, aluminum fencing offers a wide range of styles to suit various needs and preferences.

Whether you’re looking to add curb appeal, define boundaries, or ensure poolside safety, there’s an aluminum fence to perfectly match your vision. Explore the unique characteristics of different aluminum fence types to find the ideal solution for your space.

Classic Aluminum Fence

The Classic Aluminum Fence is characterized by its straightforward design, seamlessly blending into a variety of architectural styles. Its vertical pickets and evenly spaced rails create a traditional aesthetic. 

Optional accents such as decorative finials or arched gates can further enhance its traditional charm. The Quad Flair Finial from Iron Fence Shop is crafted using a sand casting process instead of die casting, giving it a subtly rougher and more organic texture. True to the standard of a quality fence, each finial is securely welded to every picket, never glued or screwed.

This aluminum fence style is well-suited for defining property lines or creating a welcoming perimeter with a subtle, classic look.

Smooth Top Aluminum Fence

The Smooth Top Aluminum Fence is recognized for its sleek design, incorporating a continuous top rail that creates a clean, modern appearance. Unlike traditional fences with exposed picket tops, the smooth top rail eliminates sharp lines or protrusions, delivering a uniform, streamlined profile that blends seamlessly into contemporary landscapes.

This aluminum fence style is particularly popular for those wanting complete lines, as the smooth top rail creates a visually cohesive finish. It’s available in multiple configurations, offering a choice of picket spacing or additional horizontal rails for custom design possibilities.

Pool Code Aluminum Fence

The Pool Code Aluminum Fence is specifically designed to meet the safety requirements for pool enclosures, ensuring compliance with local regulations. Its fence height, picket spacing, and self-latching gate options are crafted to provide a protective barrier. The design allows clear visibility into the pool area, blending safety with practicality.

Iron Fence Shop’s pool-style aluminum fence is designed for safety and functionality. Its smooth top rail, flush bottom rail, and height meet the height requirement of the National BOCA Pool Code and most local pool codes. This versatile design also works well as a barrier for patios, decks, or atop walls when paired with our welded post flanges.

Ornamental Aluminum Fence

The Ornamental Aluminum Fence stands out with its decorative design elements, offering a sophisticated touch to any property. Intricate patterns, arched tops, or decorative finials can be incorporated into the design, elevating it beyond a typical fence. The ornate details make it ideal for homeowners looking to enhance the aesthetic appeal of their space while creating an eye-catching focal point.

This fencing type is available in a variety of styles and finishes, allowing for a high degree of customization. Whether featuring geometric patterns, scrollwork, or other design flourishes, this fence style serves as both a functional boundary and a stylish statement piece. It complements gardens, driveways, and entryways, providing a finished and polished look to any setting.

Tip: Choose an aluminum fence product with durable finishes and customizable options to suit your space and preferred style. Iron Fence Shop’s aluminum fence panels, posts, and gates go through a detailed multistage cleaning process and are coated with a TGIC fade-resistant polyester powder coat, ensuring superior durability and long-term performance.

What Are the Benefits of Different Aluminum Fence Types?

black iron fence installed on stone wall under blue sky

Aluminum fences are highly valued for their durability, versatility, and low maintenance, making them an excellent choice for a variety of property needs. Each type of aluminum fence offers unique benefits tailored to specific functions, styles, and safety requirements. Here’s how different aluminum fence types can enhance your property’s value and appeal:

  • Classic Aluminum Fence: Ideal for defining property boundaries or creating timeless curb appeal, its understated design pairs seamlessly with both modern and traditional architecture. The simplicity ensures long-lasting elegance with minimal upkeep.
  • Smooth Top Aluminum Fence: Perfect for contemporary homes or businesses, its streamlined design delivers a sleek, polished aesthetic. With a continuous top rail eliminating sharp edges, it ensures safety while maintaining a minimalist look. 
  • Pool Code Aluminum Fence: Designed to meet safety regulations for pool enclosures, this style prioritizes protecting children and pets while offering a clear, open view into the pool area. It combines compliance with a subtle, attractive design.
  • Ornamental Aluminum Fence: For homeowners seeking a decorative, high-end option, this style incorporates intricate patterns, finials, and arched tops. It serves as a focal point with refined elegance.

Additional Benefits of Aluminum Fencing:

  • Customizable Styles: With its variety of finishes and designs, it caters to both residential-grade aluminum fence and commercial-grade aluminum fence needs, offering unmatched flexibility.
  • Lightweight Durability: Easy to install yet strong enough to withstand harsh weather, aluminum fencing balances functionality with aesthetic appeal.

Whether prioritizing safety, modern style, or decorative elegance, aluminum fencing is a long-term investment in your property’s beauty.

How Do Color and Finish Impact Aluminum Fencing?

The color and finish of aluminum fences significantly influence their style and performance. A range of color options allows property owners to match their fences to their home’s architecture and landscape.

Powder coating is a great finishing technique, enhancing durability by resisting chipping, scratching, and fading. This process creates a smooth and uniform appearance while improving the fence’s ability to withstand harsh weather. 

Textured finishes that mimic the classic look of wrought iron or wood offer a traditional aesthetic without the upkeep, making them a great option to enhance your space with timeless charm

Color and finish play a key role in functionality. Light colors, like white, reflect sunlight to minimize heat absorption, while darker hues, such as black, offer excellent heat retention and work well in colder climates. Choosing the right color and finish ensures a stunning, durable fence that aligns with your preferences and suits the environment.

Enhance Spaces with Aluminum Fencing

Ready to transform your outdoor space with a stunning aluminum fence? Explore Iron Fence Shop’s exclusive range, featuring authentic detailing and superior rust-inhibition for lasting beauty. 

Don’t wait—experience the personalized service and expert guidance that sets us apart. Check out our aluminum fence styles now and find the perfect fence to elevate your property!

How To Install Sliding Gates For Your Driveway?

black iron sliding gate installed next to stone pillar

Installing a sliding gate for a driveway is a practical solution for enhancing safety and convenience. Sliding gates are ideal for properties with limited space, as they do not require the swing area that traditional gates do.

If you’re wondering how to install sliding gates (driveway), this step-by-step guide provides a comprehensive overview of the steps involved in selecting, preparing, and installing a sliding gate, ensuring a smooth and efficient process. By understanding the necessary tools, materials, and techniques, homeowners can successfully install a sliding gate that meets their specific needs and preferences.

What Are the Benefits of Installing Sliding Gates for Your Driveway?

Sliding gates are a practical and stylish upgrade for both residential and commercial properties. They are ideal for properties with limited driveway space or uneven terrain. Unlike swing gates, they move horizontally along a track, eliminating the need for an opening arc. This design allows vehicles to park closer to the gate without interfering with its movement, maximizing the usable driveway area.

While sliding gates may require a higher initial investment due to their specialized components, such as tracks, rollers, and robust mechanisms for smooth operation, this upfront cost is justified by their exceptional durability and reliability. The materials and engineering involved in their construction are designed to withstand heavy use and various weather conditions, ensuring long-term performance.

What Tools and Materials Are Needed?

To successfully install a sliding gate for a driveway, it is essential to gather the appropriate tools and materials. This preparation ensures a smooth installation process and contributes to the longevity and functionality of the gate system. 

Tools

  • Measuring Tape: Accurate measurements are crucial for ensuring the gate fits the designated space and operates correctly.
  • Level: A level is used to ensure that the track and gate are installed evenly, preventing operational issues.
  • Drill and Drill Bits: These are necessary for creating holes in the ground or mounting surfaces to secure the track and other components.
  • Wrench Set: Wrenches are used to tighten bolts and nuts, securing various parts of the gate system.
  • Screwdriver Set: Different types of screwdrivers may be needed to assemble components and secure electrical connections.
  • Hammer: A hammer may be required for minor adjustments and securing certain components.
  • Saw: Depending on the material of the gate or track, a saw may be needed to make precise cuts.

Materials

  • Sliding Gate Kit: This typically includes the gate itself, track, rollers, and mounting hardware. It is important to select a kit that matches the same width, gate size, and weight requirements of the driveway.
  • Concrete Mix: Used to create a stable foundation for the track, ensuring it remains level and secure over time.
  • Bolts and Screws: These are used to secure the track and other components to the ground and surrounding structures.
  • Lubricant: Essential for maintaining the smooth operation of the gate, reducing friction and wear on moving parts.
  • Electrical Wiring and Connectors: Necessary for connecting the motor and any additional electrical components, such as sensors or lights.
  • Safety Equipment: Includes gloves, goggles, and other protective gear to ensure safety during the installation process.

Strength Meets Style: When choosing material for your driveway gate, consider options that balance durability, functionality, and aesthetics. Aluminum gates offer lightweight construction with exceptional corrosion resistance for all-weather durability, while wrought iron gates provide unmatched strength, timeless rigidity, and superior impact resistance for long-lasting performance.

How Do You Install the Gate Track?

one-storey home with sliding gate entrance

To install the gate track for a sliding driveway gate, it is essential to follow a series of precise steps to ensure proper alignment and functionality. The installation of the gate track is a critical component of the overall gate system, as it provides the foundation upon which the gate operates. The following steps outline the process for installing the gate track:

1. Site Preparation

Begin by clearing the installation area of any debris, vegetation, or obstacles that may interfere with the track placement. The ground should be level and compacted to provide a stable base for the track. If the surface is uneven, it may be necessary to pour a concrete foundation to create a level surface. Ensure there is sufficient space for the gate to slide freely.

2. Measurement and Marking

Accurately measure the length of the track required for the gate. The track should extend beyond the entire width of the gate to accommodate the closed position and its movement. Use a chalk line or spray paint to mark the path where the track will be installed, ensuring it is straight and aligned with the intended direction of the gate.

3. Track Installation

Position the track along the marked path. If using a concrete foundation, drill holes into the concrete at regular intervals to secure the track with anchor bolts. For installations on other surfaces, use appropriate fasteners to secure the track. It is crucial to ensure that the track is level throughout its length to prevent operational issues with the gate.

4. Alignment Check

Once the track is secured, perform an alignment check to verify that it is straight and level. Use a spirit level to confirm the track’s horizontal alignment. Any deviations should be corrected by adjusting the track or its supports.

5. Track Testing

Before proceeding with the installation of the gate, test the track by rolling a small section of the gate or a similar object along the track. This test will help identify any irregularities or obstructions that may impede the gate’s movement. Make necessary adjustments to ensure smooth operation.

6. Final Adjustments

After confirming the track’s alignment and functionality, make any final adjustments to the track’s position or fasteners. Ensure that all components are securely tightened and that the track is free of debris or obstructions.

How Do You Mount the Gate?

driveway gate with stone pillars

Mounting a sliding gate involves several precise steps to ensure proper alignment and functionality. The process begins with positioning the gate on the previously installed track. It is crucial to ensure that the gate is aligned correctly with the track to prevent derailment and ensure smooth operation. 

The following steps outline the procedure for mounting a sliding gate:

1. Position the Gate

Carefully lift the gate and place it onto the track. It is advisable to have multiple people assist with this step to ensure the gate is positioned accurately and safely.

2. Align the Gate

Once the gate is on the track, check its alignment. The gate should be parallel to the track and evenly spaced from the ground. Use a spirit level to verify that the gate is level across its entire length.

3. Secure the Gate

Attach the gate to the track using the appropriate hardware, such as rollers or wheels, which are typically included in the gate kit. Ensure all fasteners are tightened securely to prevent movement or wobbling during operation.

4. Adjust the Rollers

Adjust the rollers or wheels to ensure they are making full contact with the track. This adjustment is critical for the gate’s stability and smooth sliding motion. The rollers should be checked for proper tension and alignment.

5. Install End Stops

Install end stops at both ends of the track to prevent the gate from sliding off the track. These stops are essential for safety and to protect the gate from damage.

6. Test the Gate

Manually slide the gate back and forth along the track to test its movement. The gate should move smoothly without any resistance or obstruction. If any issues are detected, recheck the alignment and roller adjustments.

7. Fine-Tune Adjustments

Make any necessary fine-tuning adjustments to the gate’s position, rollers, or track to ensure optimal performance. This may involve slight modifications to the roller tension or repositioning the gate slightly for better alignment.

Key Insight: Proper mounting of the sliding gate is essential to prevent operational issues and to maintain the safety of the driveway entrance. A secure installation ensures smooth functionality, long-term durability, and protection against unauthorized access or accidents.

How Do You Install the Motor and Electrical Components?

To install a sliding gate opener motor, start by selecting one that is compatible with your gate’s weight and usage. Mount it securely on a stable, level surface near the gate track.
Attach the motor to the gate using a gear rack or chain, ensuring proper alignment for smooth movement. Adjust as needed to avoid obstructions.

For wiring, turn off the power supply, use appropriate insulated cables, and protect them with weatherproof conduits. Follow safety standards throughout the process.

Program the motor to set opening/closing limits, speed, and force. Refer to the manual for precise instructions, and incorporate safety features like sensors and emergency stops.

Test the gate multiple times to ensure smooth operation and functional safety features. Make adjustments if needed and schedule regular maintenance checks.

How Do You Convert a Swing Gate into a Sliding Gate?

diagram showing how to convert swing gate to sliding gate

Converting a swing gate into a sliding gate is a practical modification that enhances space efficiency and functionality. This transformation requires careful planning and the installation of specific components, as outlined below:

1. Assessment and Planning

Begin by evaluating the structure and condition of the existing swing gate. Determine if it is suitable for conversion and check whether there is sufficient lateral space for the gate to slide open and closed. Sliding gates require a guiding frame that is at least 50% longer than the gate’s width, as shown in the diagram.

2. Gate Frame Adjustment

Replace or reinforce the swing gate frame, if needed, to ensure a stable structure suitable for sliding. A standard sliding gate frame should use square or round tubing and include diagonal reinforcements. This enhances the gate’s durability and balance during sliding motion.

3. Post Installation and Placement

For a sliding gate, you must have heavy-duty posts to support the gate’s rollers at both ends of the gate’s path. Ensure that these posts are properly secured in the ground and aligned. The overhead view in the “Post Placement” diagram highlights proper placement of the posts and roller assemblies. 

4. Wheel and Roller Attachment

Attach rollers or wheels to the top and bottom of the gate frame, as shown in the “Wheel Placement on Post” section of the diagram. The rollers hold the gate securely while allowing smooth horizontal movement along the guideposts. Use suitable bolts and fasteners to ensure the rollers are firmly attached to both the gate and the posts. Check that the rollers align properly with the guideposts to prevent wobbling.

5. Sliding Track Installation (if applicable)

Depending on the design, a sliding track may be required along the ground to guide the wheels for smoother operation. This track should be properly leveled and secured with anchor bolts. Ensure the gate’s wheels rest evenly on the track to allow unobstructed movement.

6. Testing and Adjustments

Test the gate thoroughly by opening and closing it several times. Verify that the movement is smooth and that the gate aligns properly along its entire path. Make adjustments to the rollers, stoppers, or motor, if necessary, to achieve optimal performance and safety.

What Regular Maintenance Is Required?

Regular maintenance ensures sliding gates perform optimally and last longer. Key maintenance tasks include:

  • Lubrication: Lubricate rollers, hinges, and moving parts every few months to prevent friction and rust. Use a high-quality lubricant as recommended by the manufacturer.
  • Inspect for Wear: Check for structural damage like dents or misalignment, and assess rollers and bearings for wear. Replace damaged or deteriorating components immediately.
  • Clean Tracks: Clear dirt, leaves, and debris from the track regularly to ensure smooth operation. Address rust or corrosion as soon as it appears.
  • Motor & Wiring Check: Inspect the motor and electrical system to ensure all components are functioning. Seek a technician to address wiring damage or motor issues.
  • Operational Tests: Open and close the gate several times to check for resistance or unusual noises. Resolve any issues promptly to avoid further complications.

Consistent upkeep not only maximizes the efficiency and reliability of your gate but also minimizes the risk of unexpected failures or costly repairs. Regular maintenance extends the gate’s lifespan, ensuring it continues to function smoothly and securely for years to come.

Mastering Sliding Gate Installation

Installing a sliding gate for a driveway involves careful planning and precise measurement. The process includes preparing the installation area, setting up the gate track, mounting the gate, and installing the motor and electrical components. 

Regular maintenance is essential to ensure the gate’s longevity and functionality. By following these steps, homeowners can enhance their property’s safety and convenience.

Now that you know how to install a sliding gate for your driveway, it’s time to choose the perfect one. Explore our exclusive driveway gate styles at Iron Fence Shop, where each gate is crafted with authentic detailing and superior rust inhibition. 

Don’t wait—enhance your home’s curb appeal today with our expertly manufactured gates. 
Our knowledgeable team is here to guide you every step of the way, ensuring you get exactly what you need. Contact us now and take the first step towards a stunning, secure driveway!

What are the Types of Driveway Gates?

wide iron driveway double gates with decorative columns

Metal driveway gates serve as both a functional and aesthetic addition to a property, providing safety curb appeal. They come in various types, each offering distinct advantages and features tailored to different needs and preferences.

Understanding the different types of driveway gates, along with their materials, designs, and maintenance requirements, is essential for making an informed decision that aligns with the specific requirements of a property.

Swing Gates

Swing gates are a classic and popular choice for driveway access, characterized by their hinged mechanism that allows the gate panels to swing inward or outward. They can be designed as single panels (single-swing gates) or in two symmetrical panels (double-swing gates), depending on the space and aesthetic preferences. Swing gates are best suited for properties with flat driveways and ample clearance to accommodate the swinging motion.

Pros:

  • Timeless, elegant design enhances curb appeal.
  • Simple mechanism with minimal maintenance needs.
  • Works well with various materials (wood, steel, wrought iron, etc.).

Cons:

  • Requires significant space to swing open and close.
  • Not suitable for sloped or uneven driveways.

Sliding Gates

Sliding gates are a space-saving alternative to swing gates, designed to slide horizontally along a track. These gates are perfect for properties with limited driveway clearance or obstructions that prevent a swing gate from functioning properly. They are available in both tracked and cantilever designs, the latter being ideal for uneven ground or areas with debris.

Pros:

  • Requires minimal driveway clearance for operation.
  • Provides excellent security and is harder to force open than some other types.
  • Ideal for properties with sloped or uneven driveways.

Cons:

  • Tracks may require regular cleaning and maintenance to prevent obstructions.
  • More installation complexity than swing gates.

Bi-Fold Gates

Bi-fold driveway gates consist of panels that fold back onto themselves when opening, making them a highly efficient solution for properties with limited space. When space is at a premium, especially in urban settings or on steep driveways, bi-fold gates provide a compact and functional alternative to traditional swing gates.

Pros:

  • Space-efficient, requiring less clearance to function.
  • Quick opening and closing mechanism.
  • Suitable for decorative and modern designs.

Cons:

  • Complex folding mechanism may require regular maintenance.
  • Higher installation costs compared to simpler gate designs.

Vertical Pivot Gates

Vertical pivot gates use a unique mechanism that rotates the gate panel upward to open, eliminating the need for horizontal space. These gates are an innovative choice for properties with restricted driveway clearance or where aesthetic simplicity is preferred.

Pros:

  • Requires no horizontal space for operation, ideal for small or irregular driveways.
  • Provides excellent security features.
  • Modern, minimalist design enhances the appeal of modern properties.

Cons:

  • Higher upfront installation and operation costs.
  • Limited design and material options compared to traditional gates.

Telescopic (Retractable) Gates

Telescopic or retractable gates consist of overlapping panels that slide into each other when opened, similar to a telescope. This unique design combines sleek aesthetics with efficient space-saving functionality, making it ideal for narrow driveways or urban settings.

Pros:

  • Compact design saves space.
  • Smooth and elegant operation.
  • Low-profile aesthetic suits modern properties.

Cons:

  • Requires precision installation for seamless operation.
  • Can be more expensive than traditional sliding gates due to complex mechanisms.

Tip: Evaluate your driveway’s space—flat with clearance suits swing gates, while narrow or sloped works best with sliding, bi-fold, pivot, or telescopic gates. Choose materials like wrought iron or aluminum gates for durability, and factor in maintenance needs to match your style.

Automated vs. Manual Driveway Gates

Driveway gates come in two main operational styles: manual and automated. Each type serves unique purposes and aligns with different homeowner priorities such as budget, convenience, or security, making it essential to understand their features and differences to make an informed choice.

Manual Gates: A Simple and Cost-Effective Solution

Manual driveway gates rely on physical effort for opening and closing, offering a straightforward and budget-friendly option for homeowners. These gates are especially suitable for properties with infrequent entry and exit, as well as rural or low-traffic areas

Since manual gates don’t require electricity or motors, they tend to have low maintenance costs and avoid complex installations. However, they are less practical for frequent use, as manually operating the gate can become tiresome, especially during inclement weather or when convenience is a priority. Their simplicity makes them ideal for smaller properties or as temporary solutions.

Automated Gates: Convenience and Modern Security

Automated driveway gates, in contrast, prioritize convenience and advanced functionality. Operated using remote controls, smartphone apps, keypads, or sensors, they provide a seamless user experience and suit properties with high traffic volume or stringent security needs. 

Many automatic gates now integrate with modern smart home systems, offering features such as timed access, surveillance camera sync, and motion detection for an added layer of safety. 

While automatic driveway gates come with higher installation and maintenance costs, their benefits—especially hands-free operation and customizable security—make them highly desirable for residential and commercial settings. However, their reliance on power sources or battery backups can pose a challenge during electrical outages.

Both options have their merits, but the choice often depends on your property’s accessibility needs, desired convenience level, and budget constraints.

What Are the Aesthetic Options for Driveway Gates?

wide wrought iron gates with decorative columns

Driveway gates are not just functional barriers for securing access—they are also an architectural statement that can elevate the curb appeal of your property. With a wide variety of aesthetic options available, homeowners can choose designs that reflect their personal style, complement their property’s architecture, or achieve a blend of both functionality and beauty. 

From timeless classic designs to modern minimalist styles, driveway gates offer a wealth of customization possibilities. Below are some of the driveway gate styles available at Iron Fence Shop that cater to different tastes and property needs.

Classic Finial Design

The classic finial design features ornate vertical bars topped with decorative finials, which are often shaped like spears, fleur-de-lis, or other intricate elements. This style exudes timeless elegance and is ideal for properties with traditional or Victorian-inspired architecture. 

The finial design conveys sophistication while offering a sense of grandeur, making it a popular choice for estates, mansions, or homes with wrought iron fencing.

Smooth Top

For those who prefer a clean and modern look, smooth-top gates feature straight horizontal or vertical lines without decorative embellishments. The simplicity of this design makes it versatile, as it can blend seamlessly with contemporary architecture or minimalist landscaping. 

Rings and Puppy Picket

Rings and puppy picket designs incorporate horizontal circular features, or “rings,” along with additional lower pickets spaced closer together. While the rings add a touch of elegance to the overall design, the puppy picket feature serves a practical purpose by preventing small pets from slipping through the lower portion of the gate. This style is both decorative and functional, making it a favorite for family-friendly homes. 

Bixler Oak

The Bixler Oak design embraces a natural and rustic aesthetic, featuring bold framing and welded-in twisted tree branch castings for an ornate touch. Perfect for ranches, cottages, or rural properties, these gates often incorporate metal accents to ensure durability while maintaining their countryside appeal. Striking a flawless balance between decorative detail and lasting function, the Bixler Oak embodies timeless rural charm.

Regal Arch

The Regal Arch gate combines timeless curves with modern design elements. Featuring a gracefully arched top, it incorporates swirled rings and picket accents, welded in for a more stately and refined appearance. Perfect for traditional, upscale, or European-inspired properties, this sophisticated gate enhances any luxury estate with a blend of elegance and contemporary style.

Ranch Estate

Ranch estate gates deliver durability with striking visual appeal. Featuring larger and wider framing combined with welded picket accents, they offer a bold mix of modern and old-world design. This style, often seen on rural and agricultural properties, blends practicality with a commanding presence, perfectly complementing the rugged charm of ranches or farmhouses. Reliable and robust, these gates are ideal for larger properties.

Transform Your Driveway Today

Ready to transform your driveway with a gate that combines elegance, functionality, and durability? Iron Fence Shop offers a range of options tailored to your needs. Featuring authentic detailing, superior rust-inhibition, and styles like classic finials or modern smooth tops, our metal gates elevate both security and curb appeal.
With our expert team ready to guide you, there’s no better time to find the perfect gate. Contact us now for unmatched quality and personalized service!

Celebrating 15 Years in Business!

Where does the time go?!

It’s hard to believe it has been 15 years since we launched the online portion of our fence business back in 2009. It gives us a true feeling of accomplishment to think back on the thousands of people we’ve worked with over the years on their projects.

We now have over 200 blog posts, 1000+ customer-installed project photos, and over 100 helpful videos with over 1.5 million combined views on our YouTube channel. We’ve also brought new fence (Hoop and Puppy Picket) and driveway gate (Ranch, Bixler, Regal) styles on-board as stocked styles since our 10 year anniversary. And we hope to have more on the way!

Our testimonials page continues to grow with lots of kind words and photos from happy customers during our 15+ year run. You can check those out here on our Testimonials page. There are lots of happy people on there! Not only are they happy with the quality of their fences and gates, but with the level of customer service and assistance we provided during the planning and quoting process.

We’ve also gotten so many beautiful project photos from customers over the years. You can see and sort through those images here on our Photo Gallery page. The coolest part of the gallery is that 99% of those photos are from homeowners that installed it all themselves. Our homeowners love to share the outcome of their project. We love seeing the pride they have in a job well done and how our fences and gates beautified their homes! After being in business 15+ years now, we’ve actually had folks buy our fence, move to a new house and then buy from us again at the new house since they loved their fence so much.

Lastly, we are very proud of maintaining our A+ rating with the Better Business Bureau (BBB) for 15 years straight now. It’s not easy to keep everyone happy when things go wrong. But, we really do try to go above and beyond to make sure you not only love your fence and gates; but are also happy with your buying experience. Making a large purchase site-unseen online can be daunting. However, we do our best to ask questions and work with our customers closely to make sure they are getting exactly what they need.

Thank you to all of our customers over the past 15 years. Here’s to another 15 years and thousands of new people finding Iron Fence Shop!