 Free Shipping over $5,000
 15 Years in Business
 18mo No Interest Financing
Do you want to know how to install a gate and what you’ll need? We dive into the details to guide you through the materials and tools typically needed to install one of our DIY Stronghold Iron® or Infinity Aluminum® gates.
This will cover a standard DIY installation of a manually operated walk (pedestrian) or driveway gate, providing you with a step-by-step guide on how to install a gate. Unlike the fencing materials, installation of a wrought iron or aluminum gate is the same whether you are installing one of our Stronghold Iron® or Infinity Aluminum® gates.
Whether you’re working with a small walk gate or a large arched driveway gate, understanding how to install a gate properly ensures durability and functionality.
Let’s start with the materials that we will be providing you for the gate project:
- Iron or Aluminum Gate Leaf(s)
- Gate Hinges
- Gate Latch(s)
- Steel or Aluminum Posts
- Iron or Aluminum Post Caps
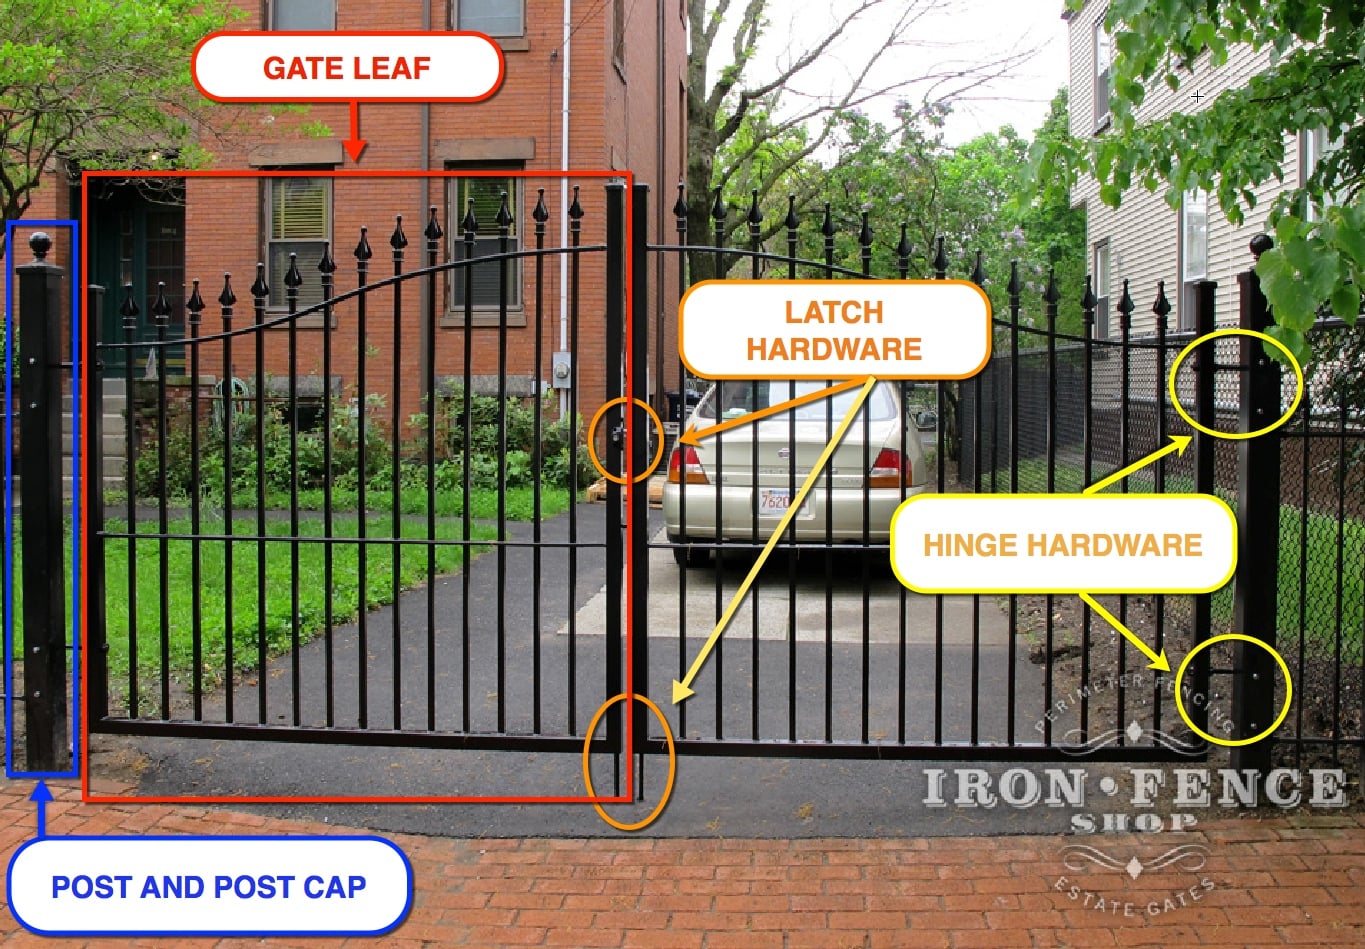
Before learning how to install a gate, it’s important to understand the key components that make up the structure.
Iron or Aluminum Gate Leaf(s)
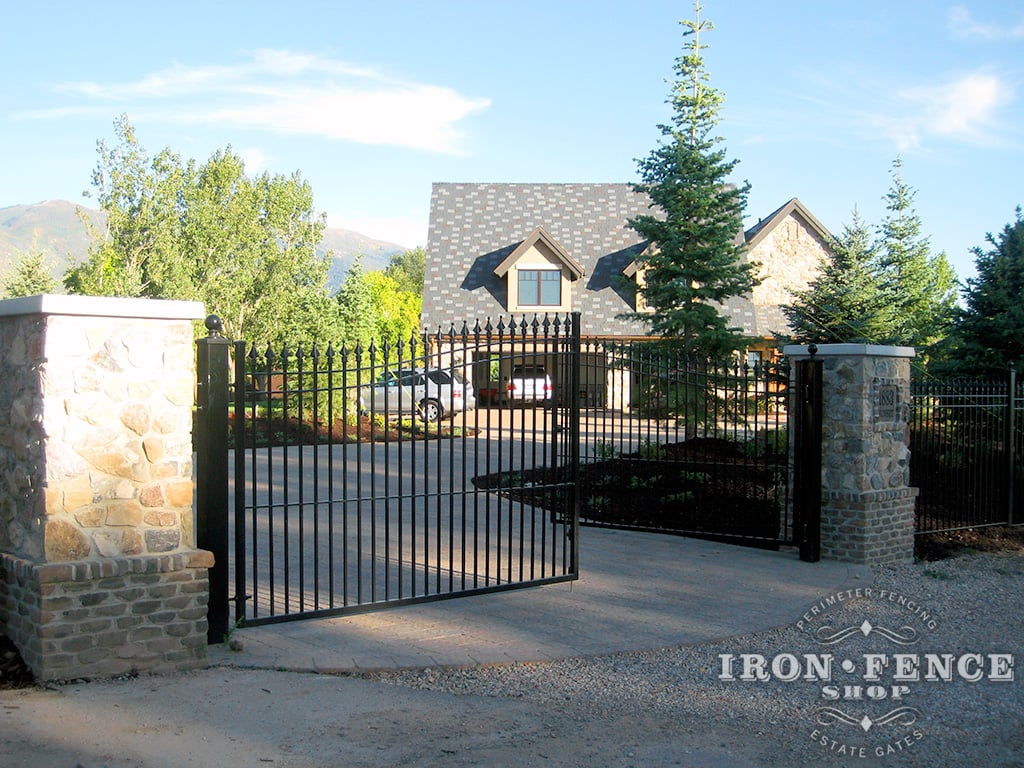
Iron and Aluminum Gates can have single or double configurations. Basically, a single gate has one leaf whereas a double gate has two leafs:
All of our gates come in what is referred to as a ‘blank’ setup. This means there are no pre-drilled post holes or attached hardware on the gate. We do this so that we can offer hinge post and latch options and give you the decision on which way the gate will swing and hinge from.
Gate Hinges
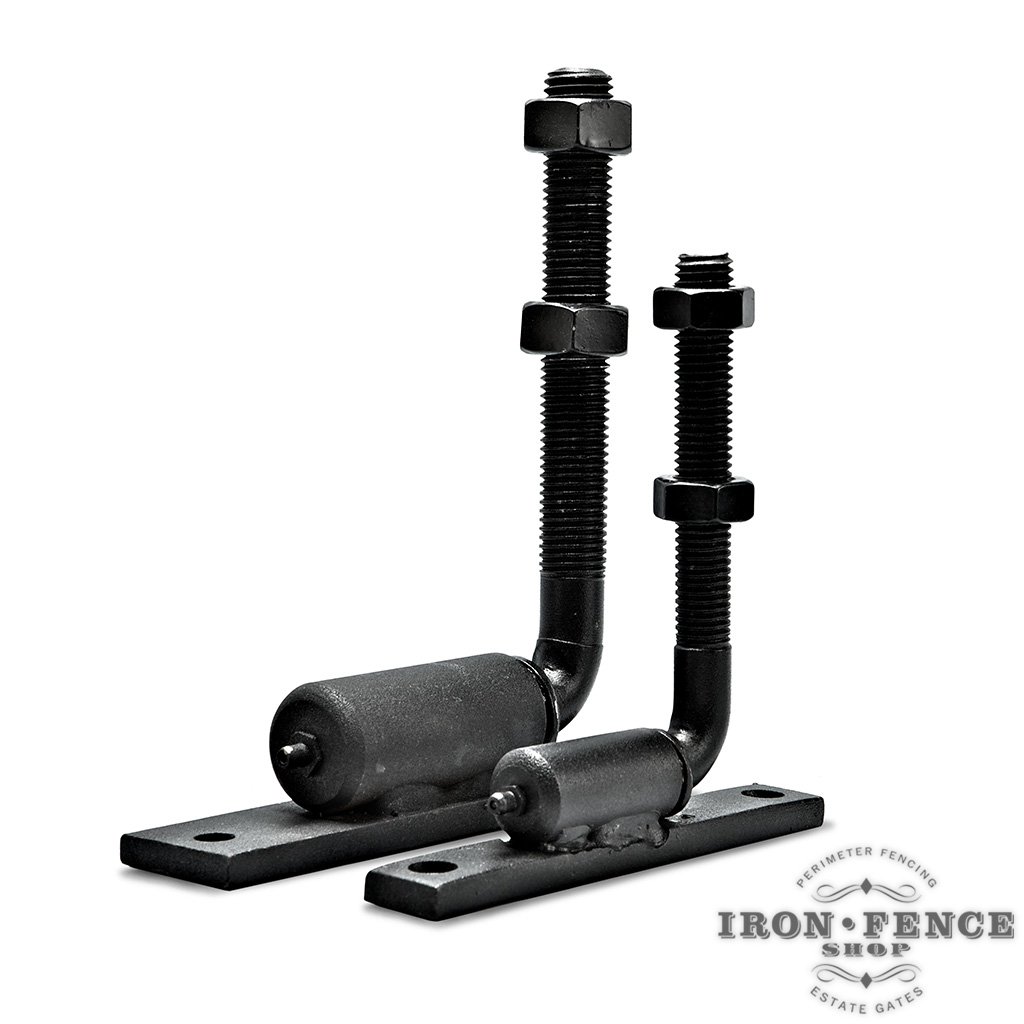
If you are installing one of our iron or aluminum driveway gates, we offer a heavy-duty 7″ J-Bolt style hinge. This style of hinge is extremely durable and rides on a ball bearing for smooth gate operation. The other perk of the J-Bolt style hinge is that it allows for adjustability. This leaves you some fudge factor between the posts.
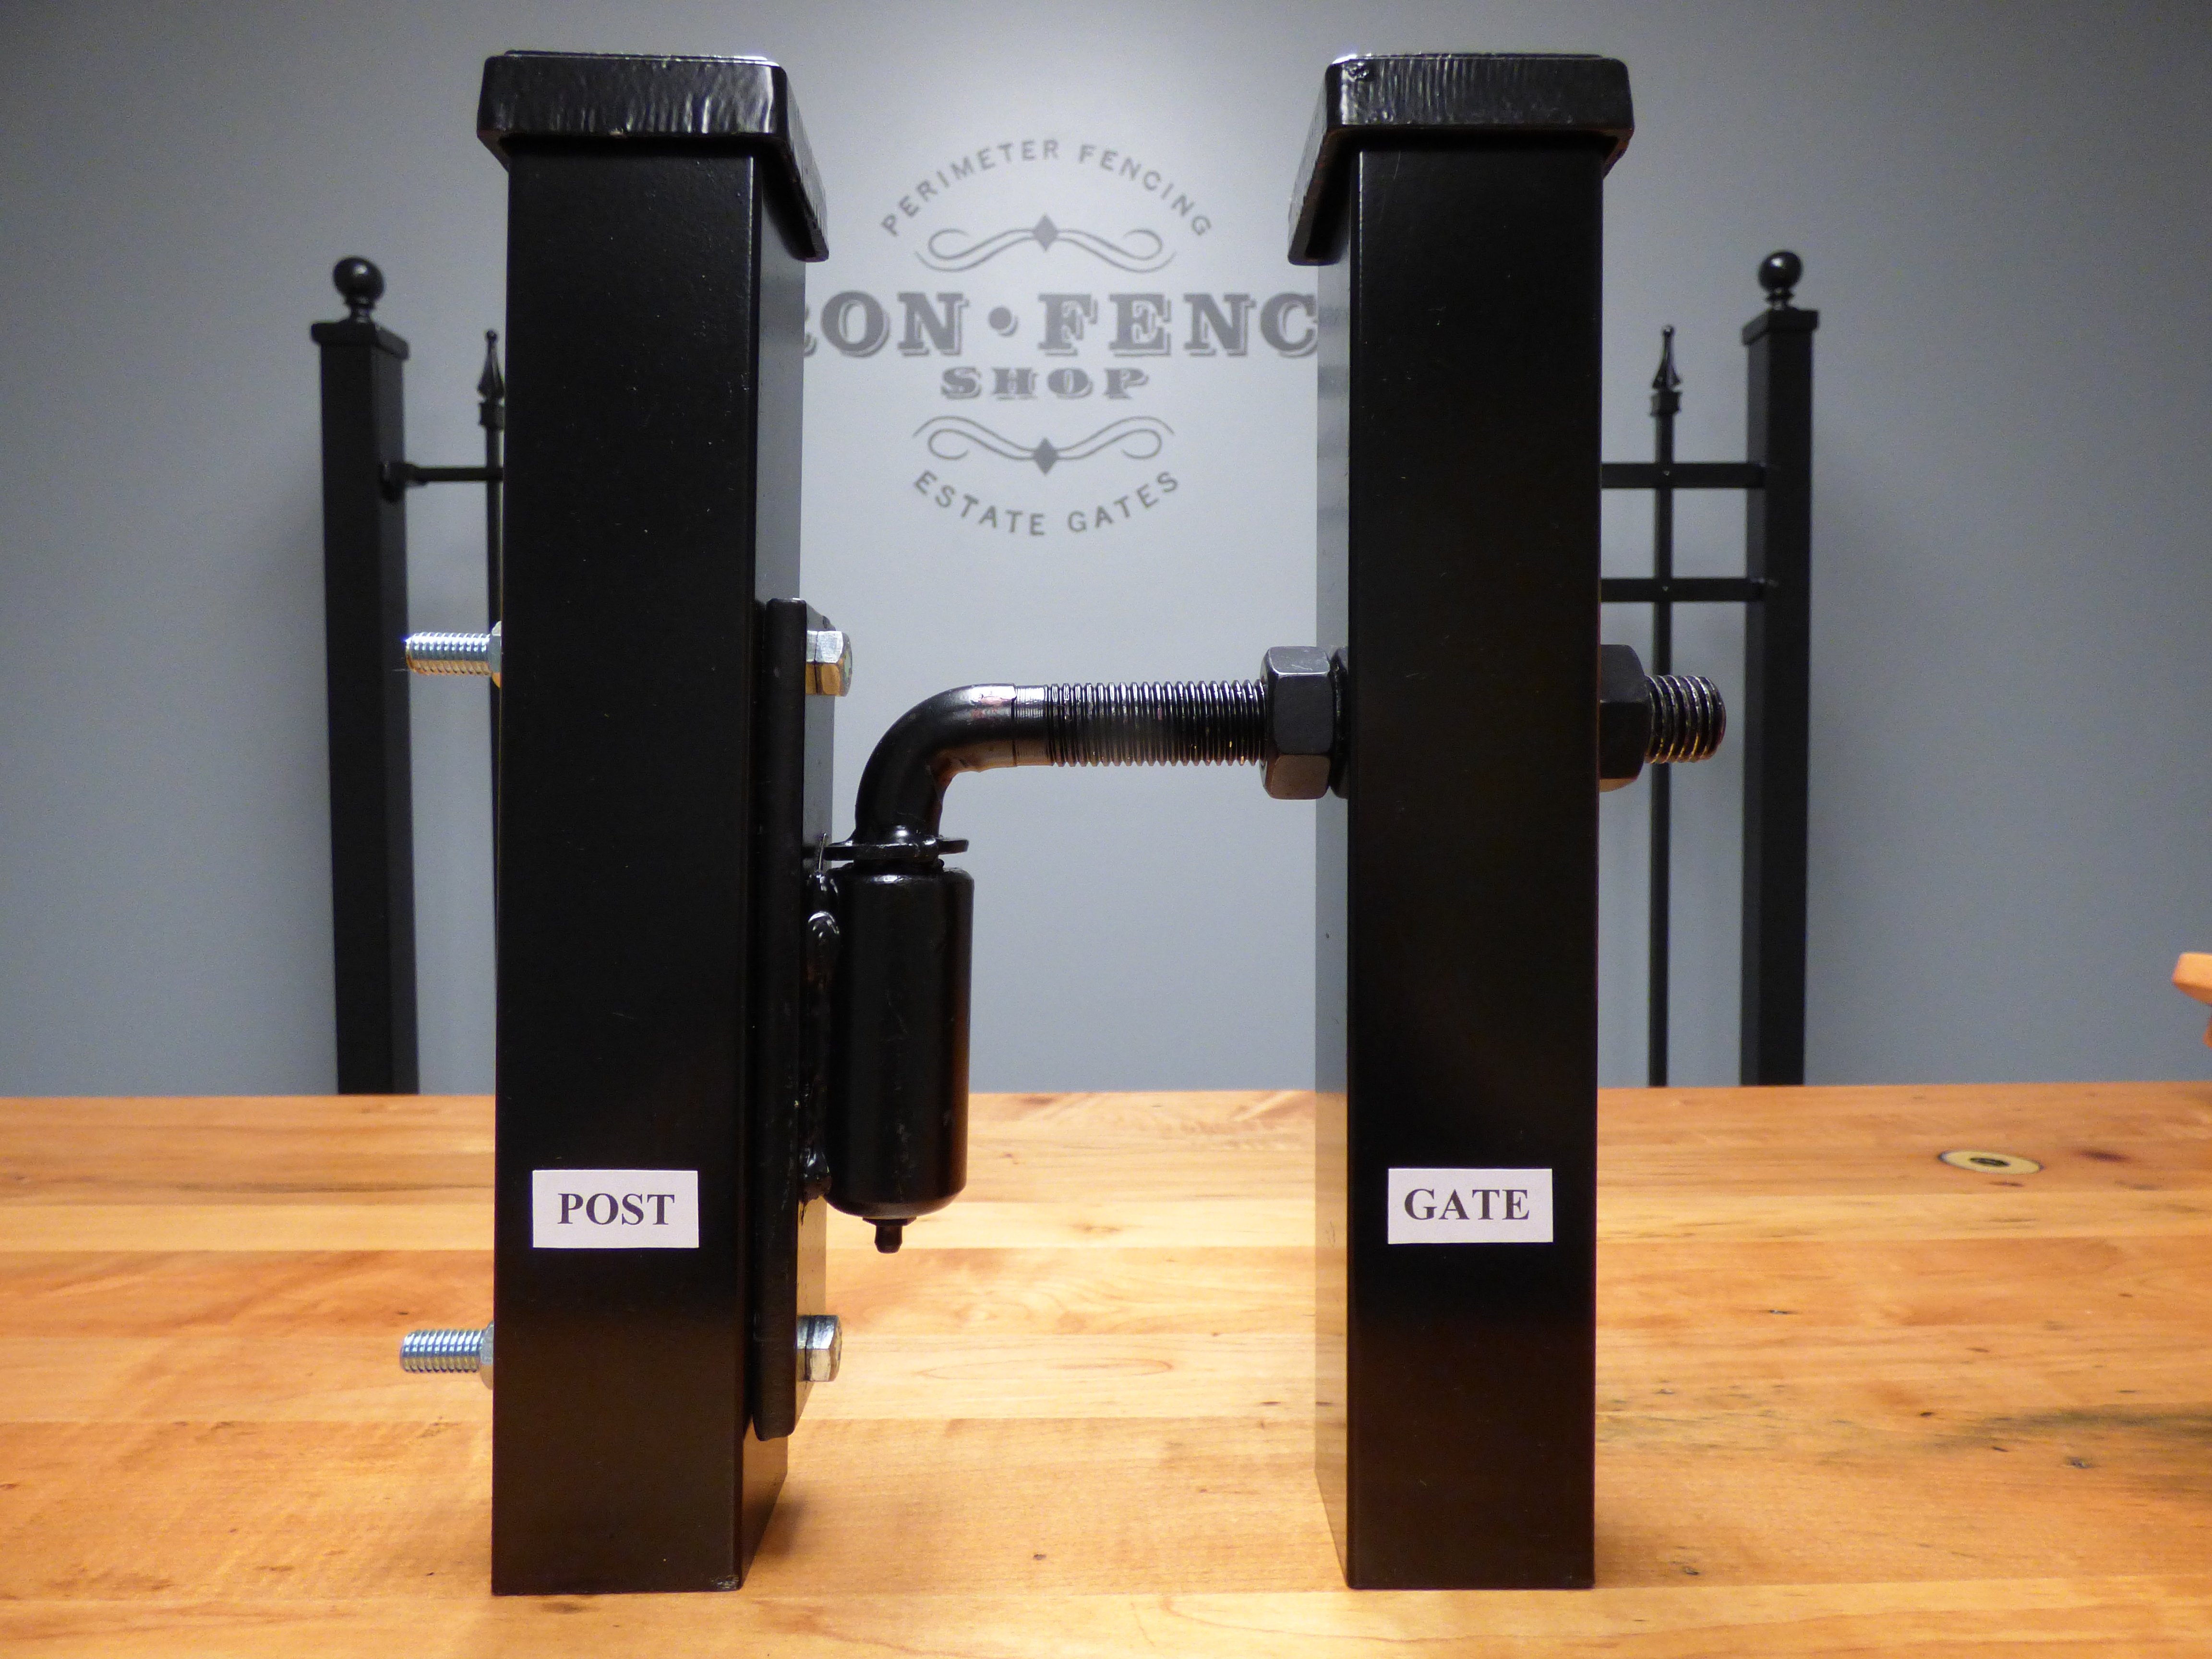
If you are installing one of our smaller walk gates, you have two options for hinges. The first is a smaller version of the J-bolt hinge we utilize for the bigger driveway gates. It comes in a 5.5″ size, and like its larger counterpart, it allows for left-right adjustability.
The second option for the smaller walk gates is a self-closing style hinge. This style of hinge more closely resembles a standard door hinge. This hinge has a spring return mechanism so that when you open and release the gate, it pulls itself back shut.
These types of hinges are often called for in swimming pool code, but can be used in standard gate installation processes as well. This style of hinge has no adjustability in it like the J-Bolt hinges. Choosing the right hinge is a crucial step in knowing how to install a gate, as it affects both the function and lifespan of your installation.

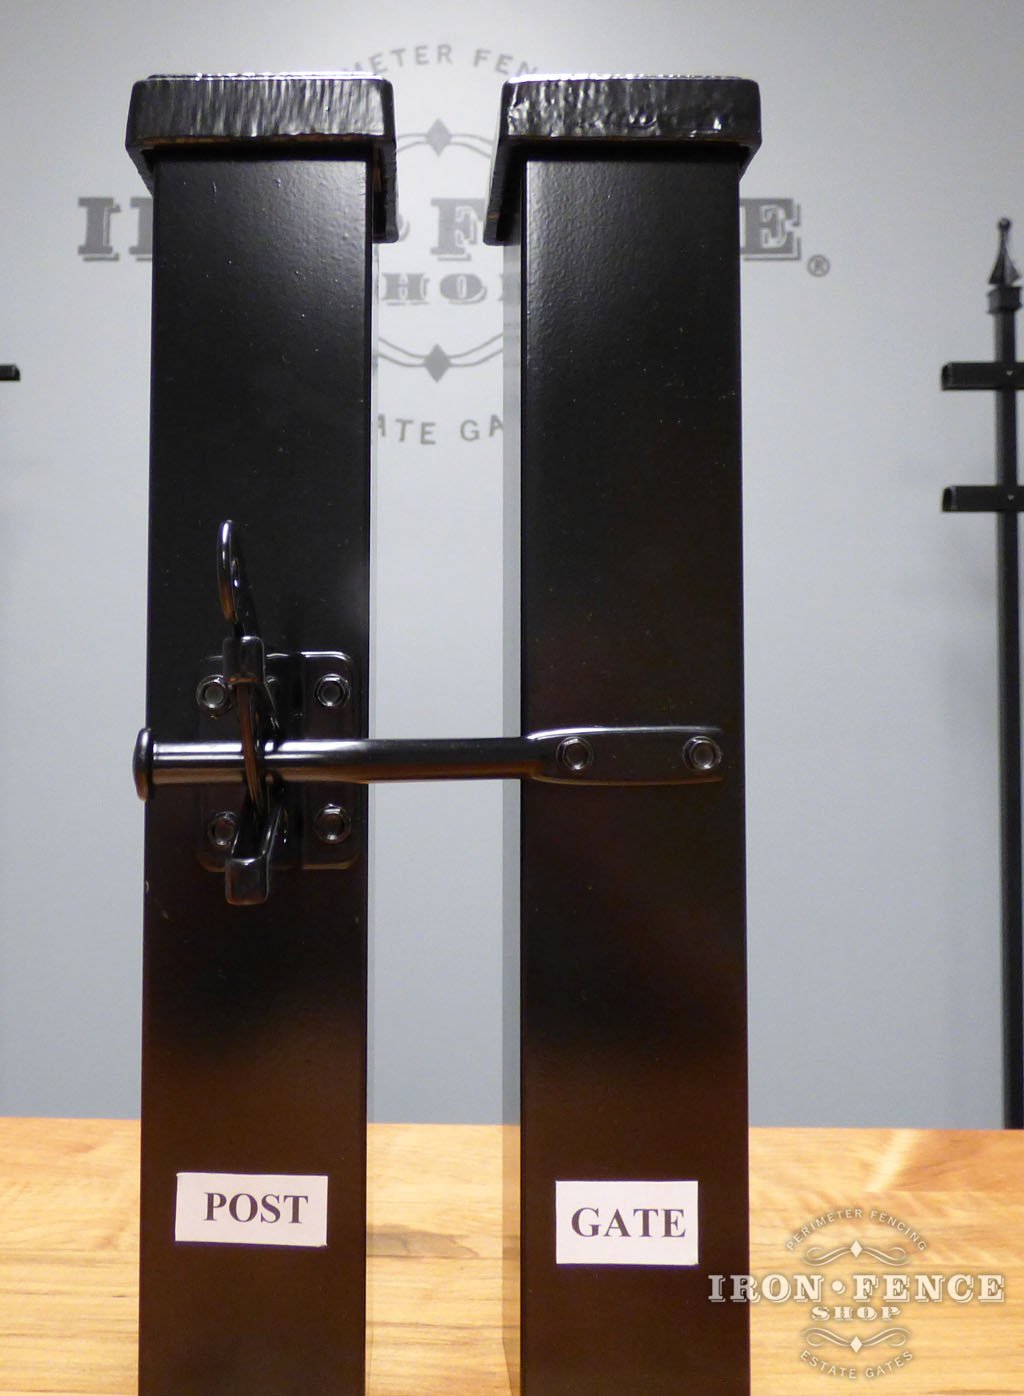
Gate Latches
For a manually operated gate, you will be supplied one of several latch options we offer. They include:
- Gravity Latch
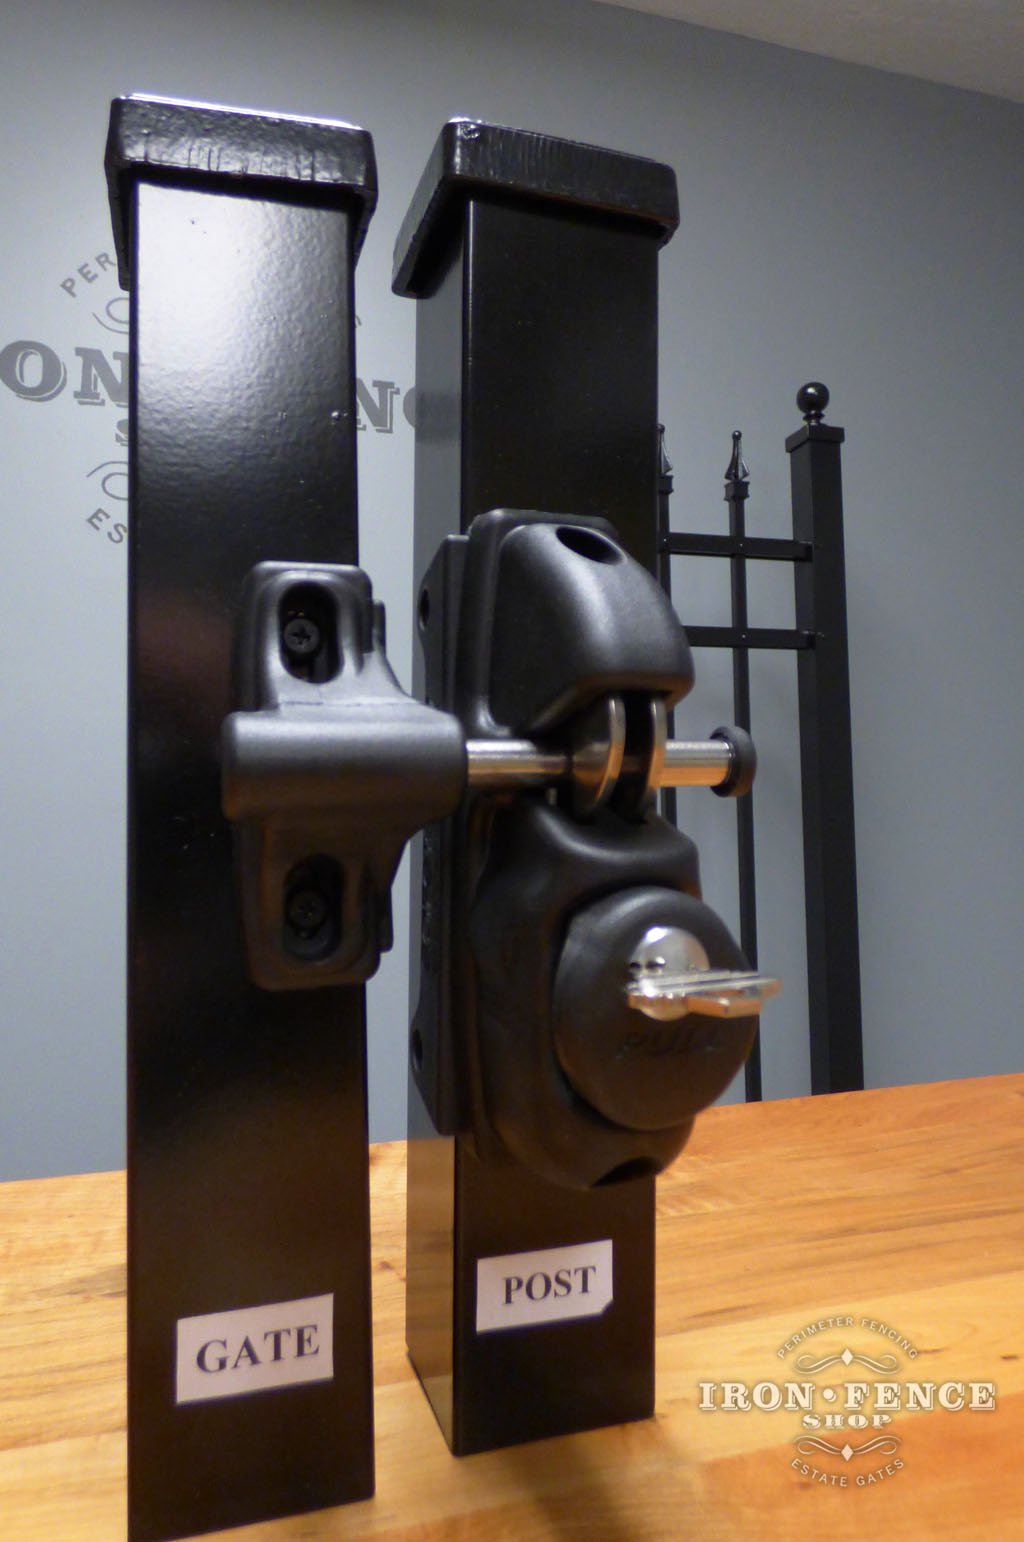
- Cobra Latch (1-sided or 2-sided operation)
- Pool Latch
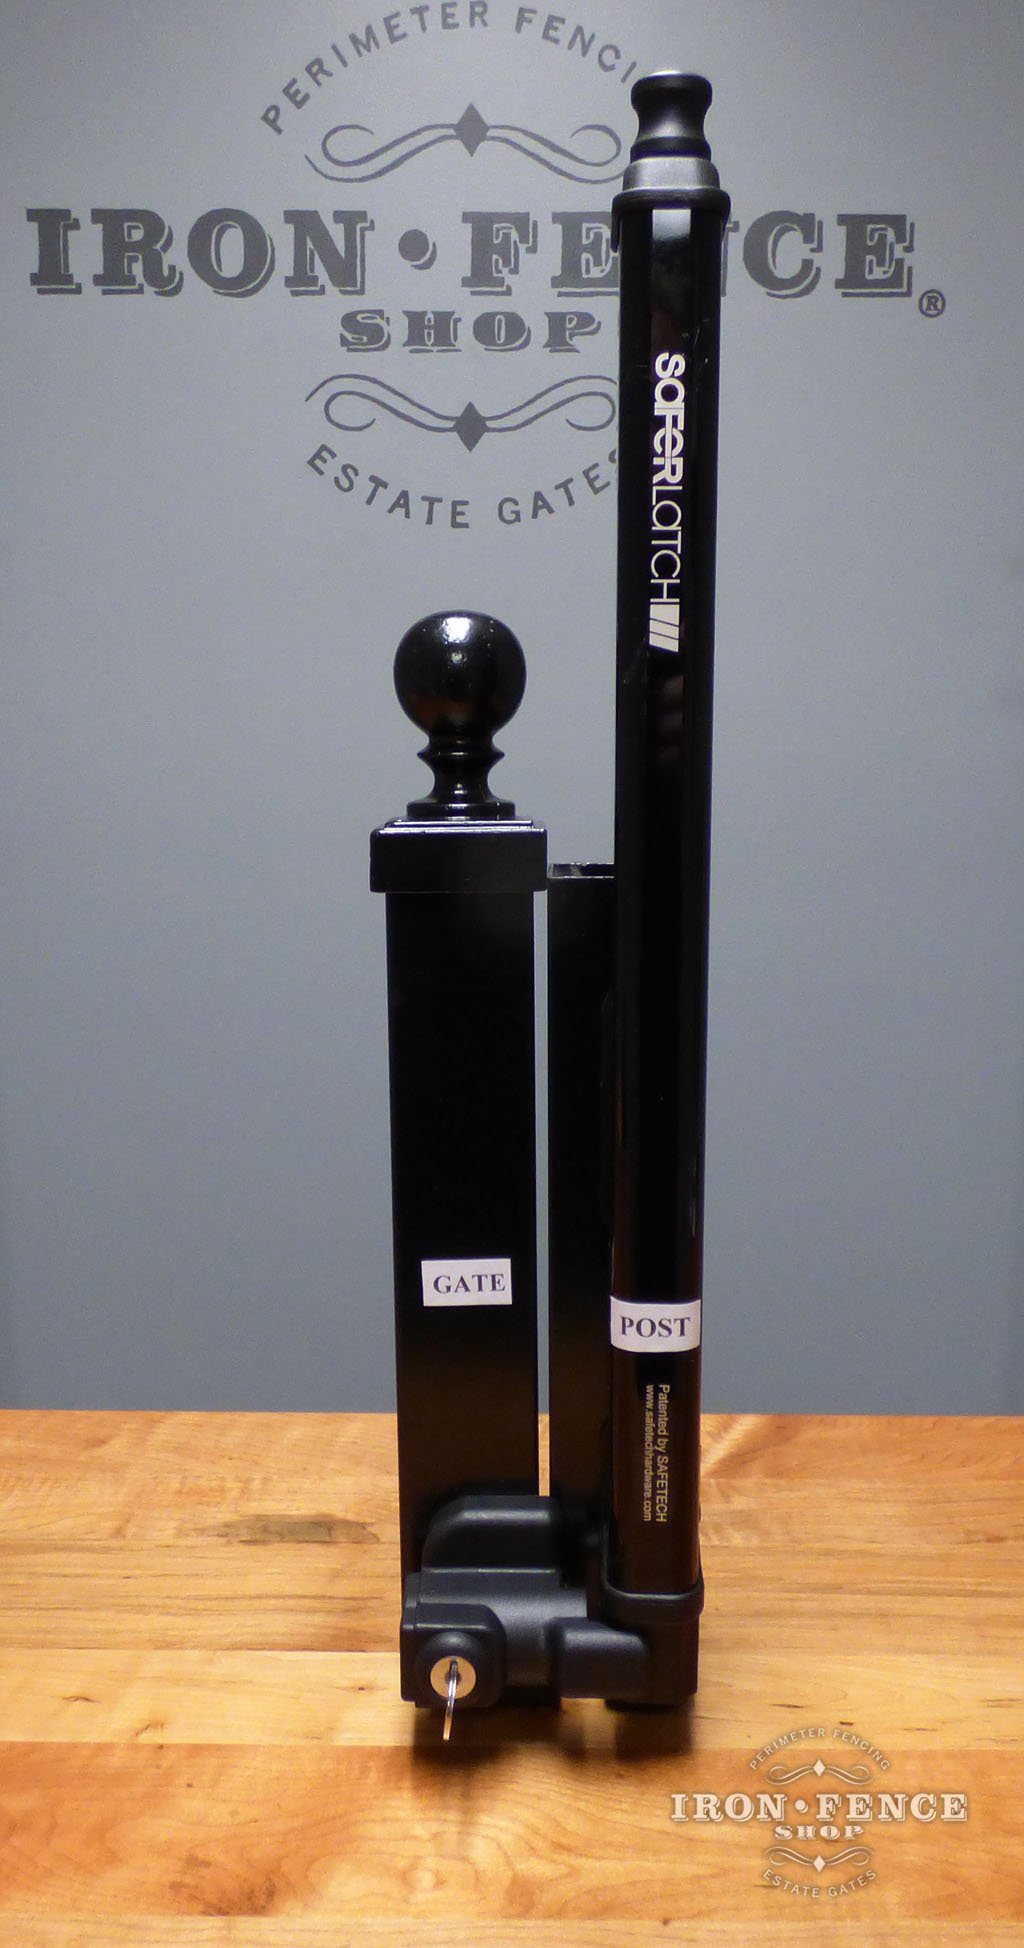
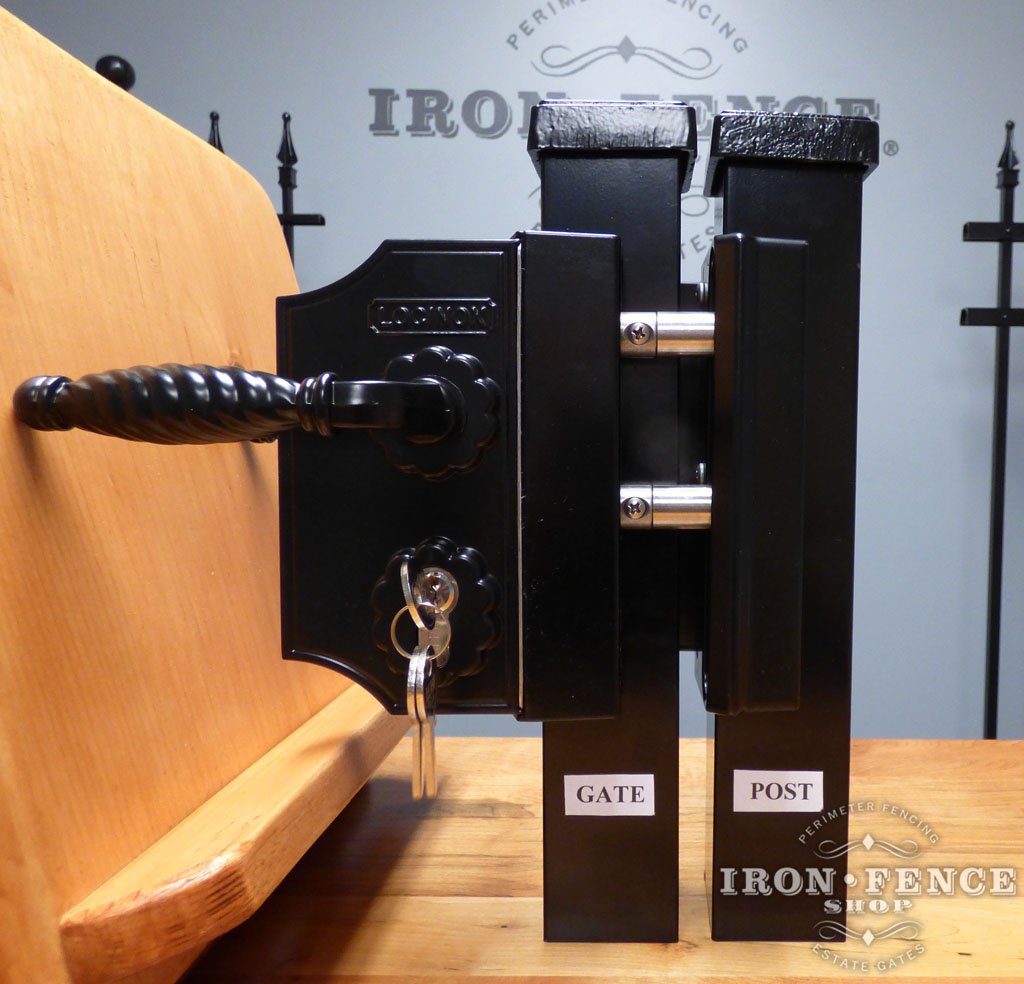
- Locinox Latch
Which latch you utilize will be based on your gate configuration and what your Iron Fence Shop® representative recommends. If no latch is specified, we typically supply the gravity latch as it is the most basic and cost-effective.
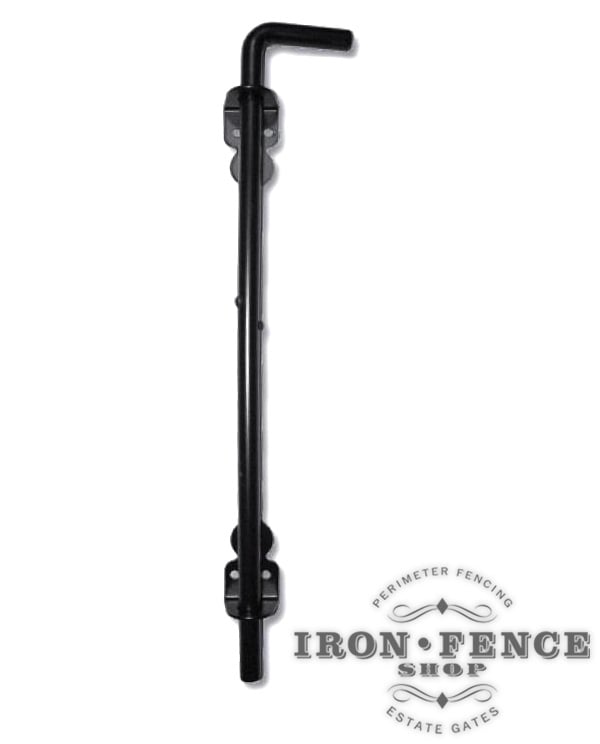
If you are utilizing a double (two-piece) gate, you will also need a drop rod for the center of the gate. The drop rod works in conjunction with the latch to hold your gate shut. The latch will hold the two leafs together, and the drop rod will go into the ground or driveway so the gate cannot move back and forth, possibly popping the latch open.
You can install one drop rod per leaf to hold both the gate leafs open and shut or simply utilize a single drop rod on one leaf of the gate. When considering the question how to install a gate, ensuring that your latch and drop rod work together is essential for a secure closure.
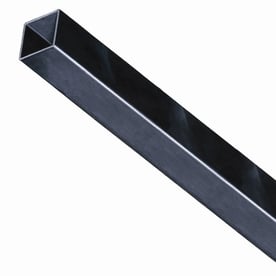
Steel or Aluminum Posts
Understanding post requirements is a fundamental part of knowing how to install a gate, as it determines overall stability.
The steel or aluminum fence posts will come loose and without a cap on them. The larger iron and aluminum driveway gate posts (4×4 and 6×6 sizes) will be blanks. Iron walk gate posts will also be blank, but aluminum walk gates can be blanks or Gate End style depending on how the gate is being installed.
If you are building some sort of column or pillar that you want the gate to be hung off of (stone, brick, engineered, stucco, cement, wood, etc) discuss the details with your Iron Fence Shop® representative. You may or may not need gate posts at all for your gate depending on the column/ pillar material and construction.
Iron or Aluminum Post Caps
The reason we do not ship the posts with the cap attached is because you have an option between our standard/ flat style and the ball style. The are affixed to the top of the post via an adhesive we supply in your install kit.

What Tools and Materials Do I Need to Provide?
So now that you know what we are providing, the next step to answer our question “how to install a gate” is knowing what tools and materials you will need be have ready on your end. Luckily, installing our Stronghold Iron® and Infinity Aluminum® gates doesn’t require anything too exotic. Here are the tools and materials you will commonly need:
- Cement – You can find all sorts of online calculators that will help you calculate how many bags you need. Just about any type of cement will work
- Bagged Gravel – This is optional but useful for fine-tuning the depth of your post hole if you accidentally over-dig the depth. Any larger river gravel is good. Stay away from smaller fill or pea gravel that is too small
- Post Hole Digging Tool – You can usually find these for under $30 at any big box hardware store next to the shovels and rakes. For those not wanting the workout, you can also usually rent a powered tool from places like Home Depot, Sunbelt or United Rentals to dig post holes
- Cement Mixing Tools – This varies a bit depending on how you like to mix your cement, but it usually isn’t much more than a wheelbarrow or tub to mix in a shovel for mixing and scooping, plus a hose or bucket for supplying water
- Power Driver/ Drill – You will use this to drill and attach your hinge and latch hardware. If drill bits are required for your specified hinges (j-bolt style), we provide the correct size drill bits as part of our installation kit
- Tape Measure – You will use this for measuring the depth of your post hole as well as the spacing between the posts
- Level – You will use this when you set your fence posts in the cement to ensure your posts are nice and level
- Rubber Mallet and Hammer – The rubber mallet makes adjusting your posts in the cement for level easier than hands alone and won’t leave marks on the post’s finish. The hammer will be used for tapping your rebar into the ground
Properly setting posts in concrete is one of the most important steps in knowing how to install a gate, ensuring long-term strength.
And That’s How to Install a Gate…
There really aren’t a lot of parts to the iron or aluminum gates, and most tools needed are ones that homeowners already own or can easily purchase. If you want more details on how to install a gate, you can visit our installation page and download our how-to-install guides, read the FAQs or watch some of our videos.
If you’re still uncertain about how to install a gate, we provide detailed resources, including videos and downloadable guides, to walk you through the process.
Don’t be afraid to tackle it on your own! You can save about 50% of the typical gate project cost by doing it yourself. Our Stronghold Iron® and Infinity Aluminum gates are extremely DIY friendly.
Don’t believe me? Check out our Photo Gallery. 95% of those photos are from homeowners who tackled it themselves and then shared the finished product with us. Still don’t believe me? Check out our Testimonials page and see what other DIY-minded folks have to say after finishing the project.
Still have questions about how to install a gate? Give us a call at 800-261-2729 or shoot us an email at [email protected] to ask our experienced staff any questions you may have about installing the fence on your own. We’re here to help!